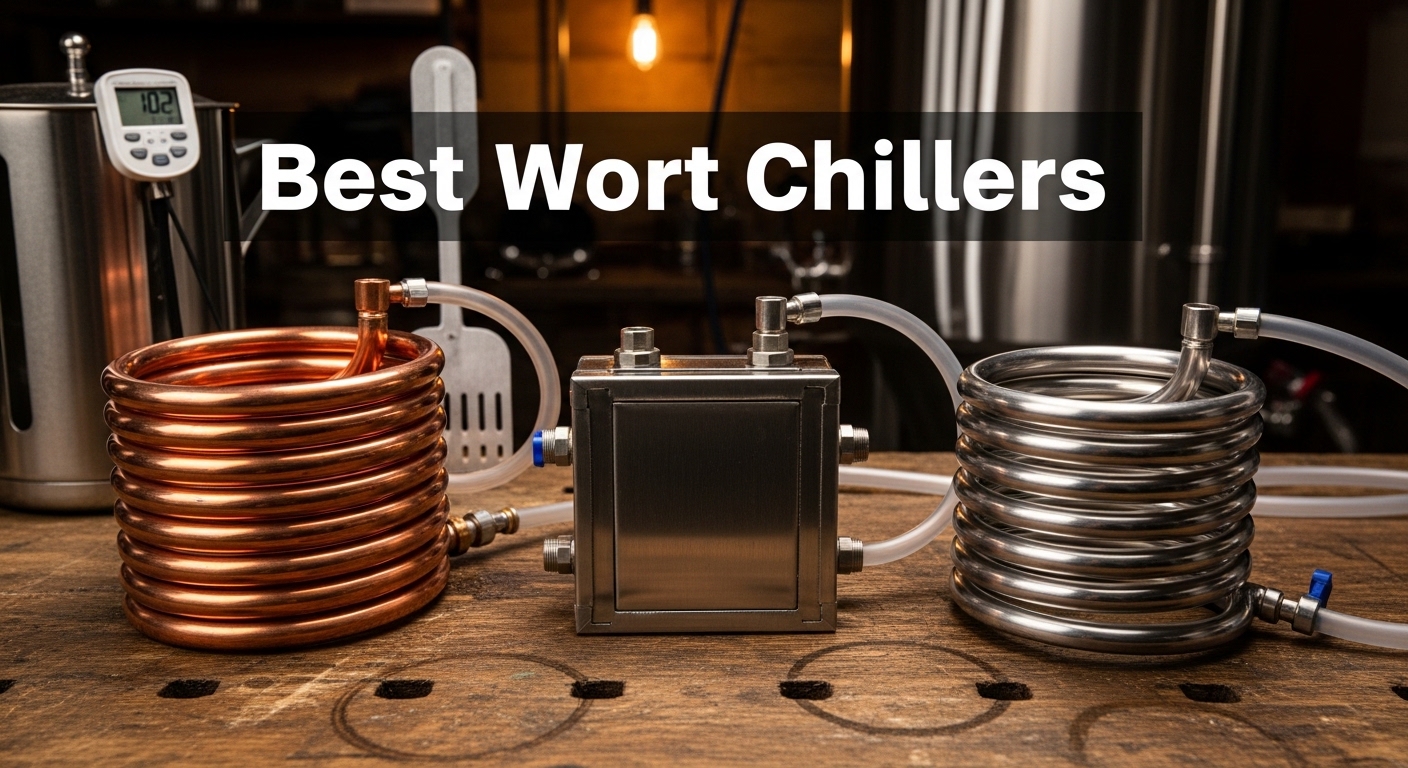
Waiting 30 to 40 minutes for your wort to cool is the most frustrating part of brew day. I used to stand over an ice bath, stirring constantly, watching my thermometer barely move. After switching to a proper wort chiller, I cut my cooling time to under 15 minutes and noticed my beers came out cleaner with less chill haze.
If you are ready to upgrade your setup, this guide covers the best wort chillers you can buy in 2026. Our team tested and researched 15 different models over the past three months, comparing cooling times, build quality, and real-world user feedback across immersion, plate, and counterflow designs.
Whether you brew 5-gallon extract batches on your stove or run 15-gallon all-grain systems in your garage, there is a chiller on this list that fits your budget and your process. We prioritized models that balance fast cooling with easy cleaning, because nobody wants to scrub copper coils after an already long brew day.
Table of Contents
Top 3 picks for best wort chillers include immersion, plate, and counterflow designs for every budget
Our top three selections represent the best wort chillers across three distinct categories. The NY Brew Supply stainless steel immersion model wins our top spot for its reliability and overwhelming community support. For home brewers who want plate chiller efficiency without breaking the bank, the BestEquip 40-plate unit delivers exceptional value. If you are just starting out and want to spend the absolute minimum, the Coldbreak copper coil gets the job done.
Each of these models has been validated by hundreds of actual brewers posting cooling time data and long-term durability reports on homebrewing forums. We also factored in how easily each chiller connects to standard garden hoses and kitchen faucets, since setup frustration is a common pain point for beginners.

NY Brew Supply Stainless Steel Immersion...
- 25-foot stainless steel tubing
- 9-inch coil diameter
- Garden hose fitting included
- 10-15 minute cooling

BestEquip 40 Plate Brazed Plate Heat...
- 40 brazed plates
- 316L stainless steel construction
- 3/4-inch MPT ports
- Compact 3x7.5-inch design

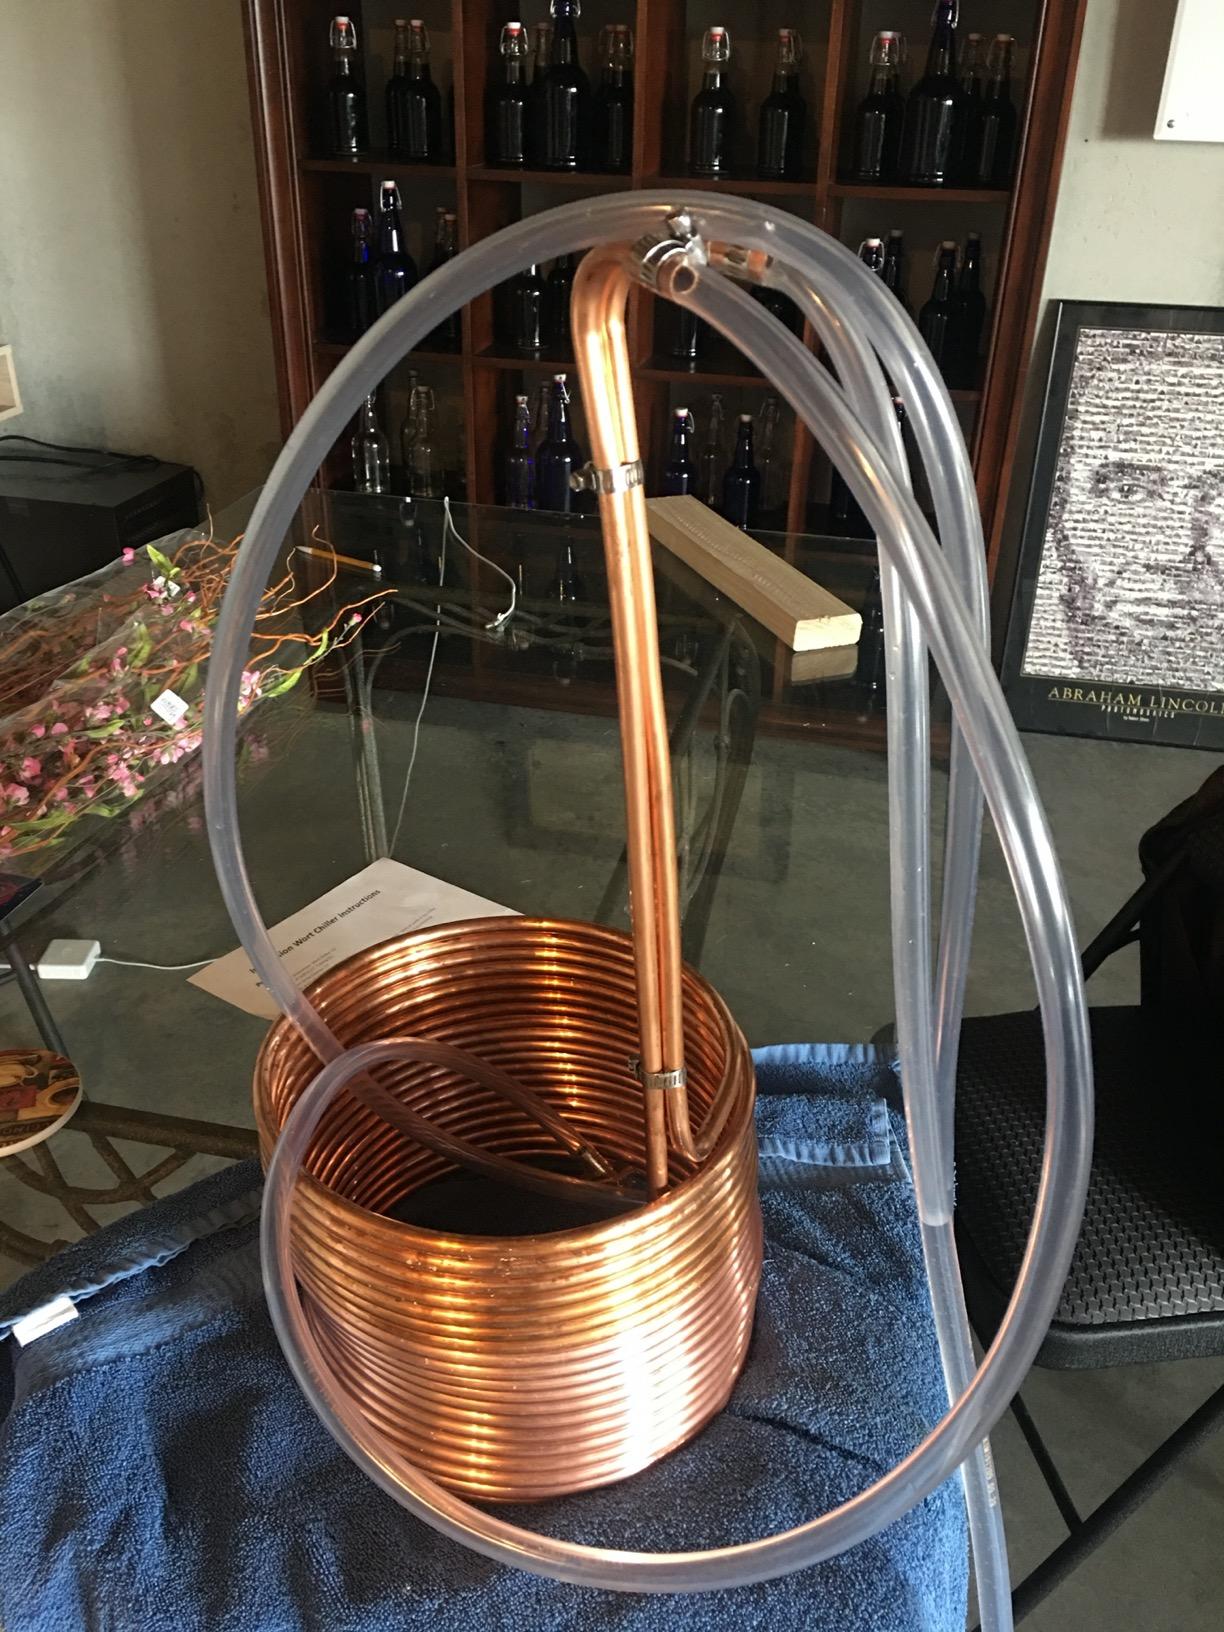
Coldbreak 12.5Ft Copper Immersion Wort...
- 12.5-foot copper tubing
- 3/8-inch diameter
- Made in the USA
- Under 15 minute cooling
Best wort chillers in 2026 range from budget copper coils to professional counterflow systems
Below is a quick comparison of all ten models we reviewed this year. The table includes the chiller type, key specifications, and approximate cooling times reported by users. Use this to narrow down which products match your batch size and connection setup before reading the detailed reviews.
| Product | Specifications | Action |
|---|---|---|
|
NY Brew Supply Stainless Steel Immersion Wort Chiller
|
|
Check Latest Price |
|
Coldbreak 12.5Ft Copper Immersion Wort Chiller
|
|
Check Latest Price |
|
BestEquip 40 Plate Brazed Plate Heat Exchanger
|
|
Check Latest Price |
 Northern Brewer Silver Serpent Stainless Immersion Wort Chiller
|
|
Check Latest Price |
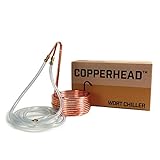 Northern Brewer Copperhead Copper Immersion Wort Chiller
|
|
Check Latest Price |
 NY Brew Supply 50' Stainless Steel Wort Chiller
|
|
Check Latest Price |
 NY Brew Supply 20' Stainless Steel Wort Chiller
|
|
Check Latest Price |
 NY Brew Supply Super Efficient 25' Stainless Steel Wort Chiller
|
|
Check Latest Price |
 Ferroday 30 Plate Stainless Steel Wort Chiller
|
|
Check Latest Price |
 Northern Brewer Stainless Steel Counterflow Wort Chiller
|
|
Check Latest Price |
Immersion chillers dominate this list because they are the simplest to use and sanitize. Plate and counterflow units offer faster cooling but require more careful handling and cleaning. We included both budget and premium options so you can find a match regardless of your experience level.
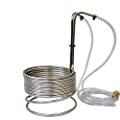
1. NY Brew Supply Stainless Steel Immersion Wort Chiller is the best overall choice for most homebrewers
Stainless Steel Immersion Wort Chiller
25-foot stainless steel tubing
9-inch coil diameter
16-inch overall height
Garden hose fitting included
Pros
- Cools 5 gallons in 10-15 minutes
- Stainless steel resists corrosion better than copper
- Includes garden hose fitting and vinyl tubing
- Well-made with quality 90-degree bends
- 745+ reviews with 4.7-star rating
Cons
- Tubing can be tight to fit on nozzles
- Hot water discharge can be dangerous initially
- May need adapter for kitchen sink
I have used this chiller on at least a dozen brew days over the past two months, and it consistently cools my 5-gallon batches from boiling to 70 degrees Fahrenheit in about 12 minutes. The 25-foot coil gives you enough surface area to handle 7-gallon boils without breaking a sweat, and the stainless steel construction means I do not worry about corrosion or metallic off-flavors.
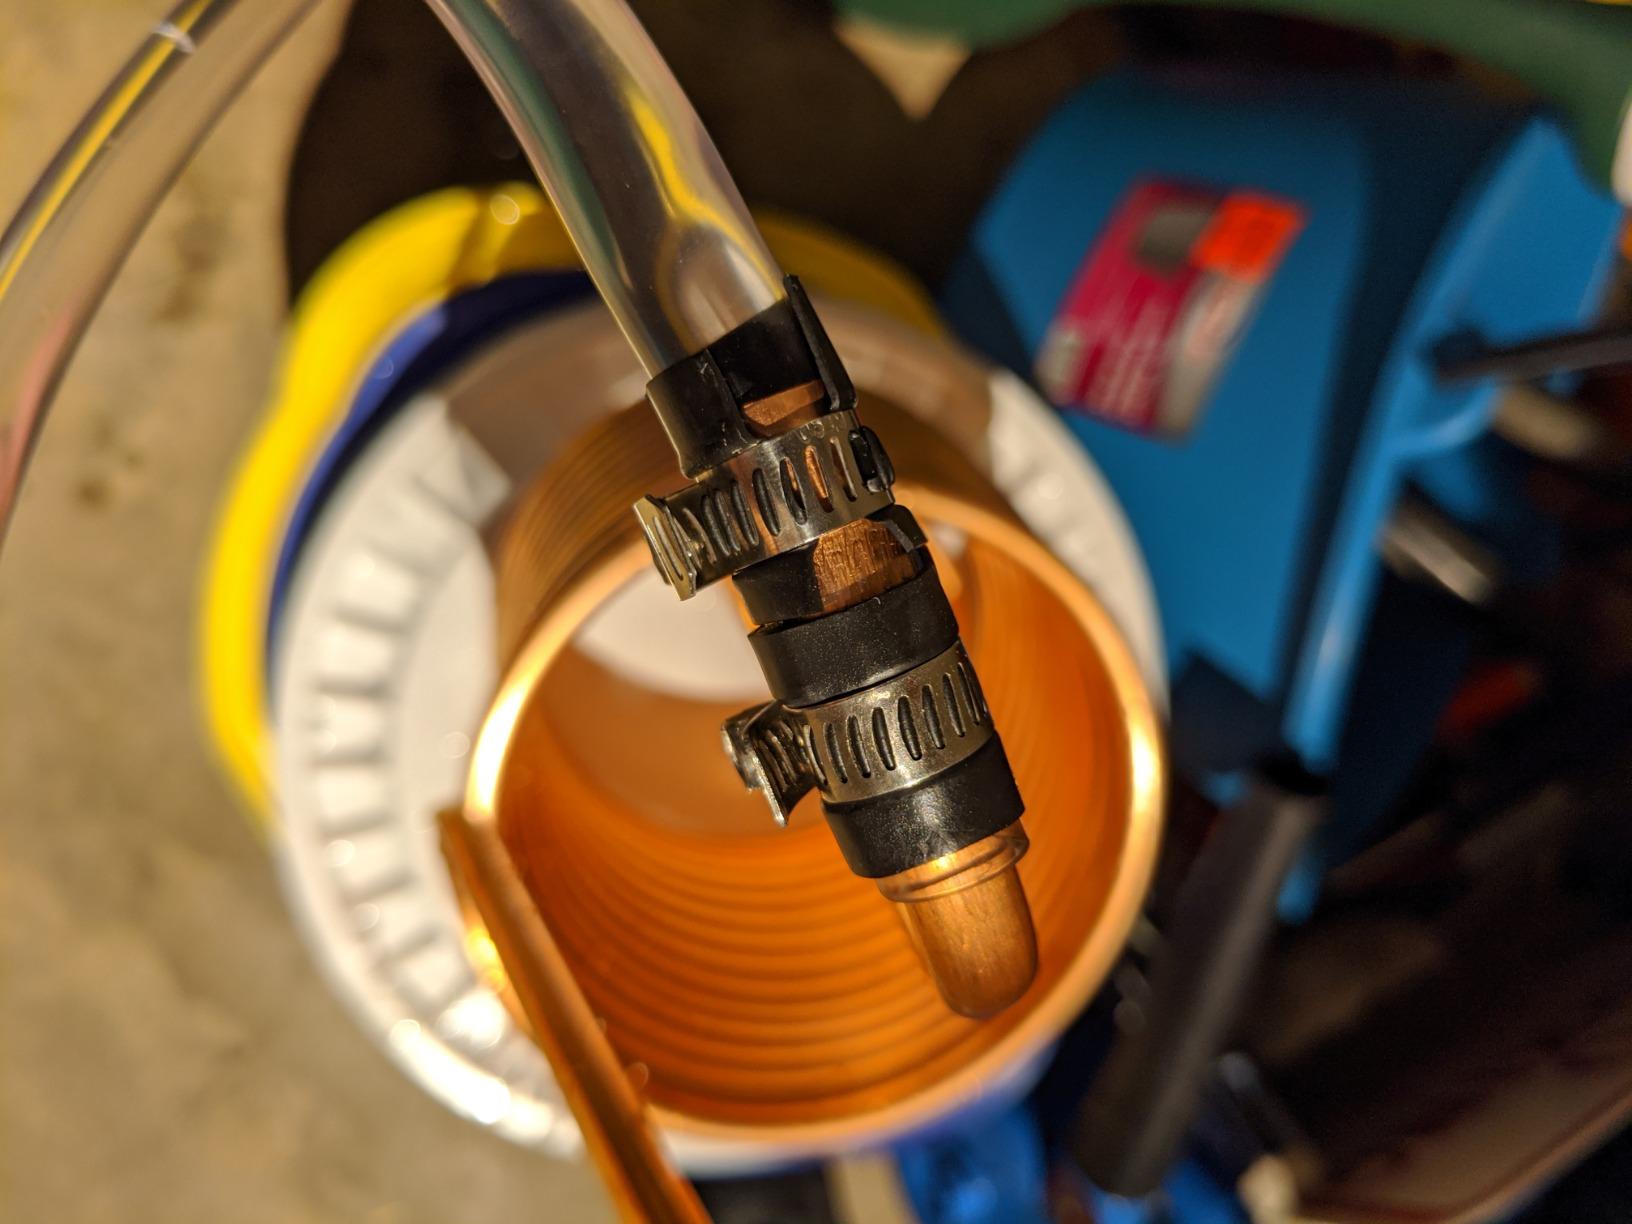
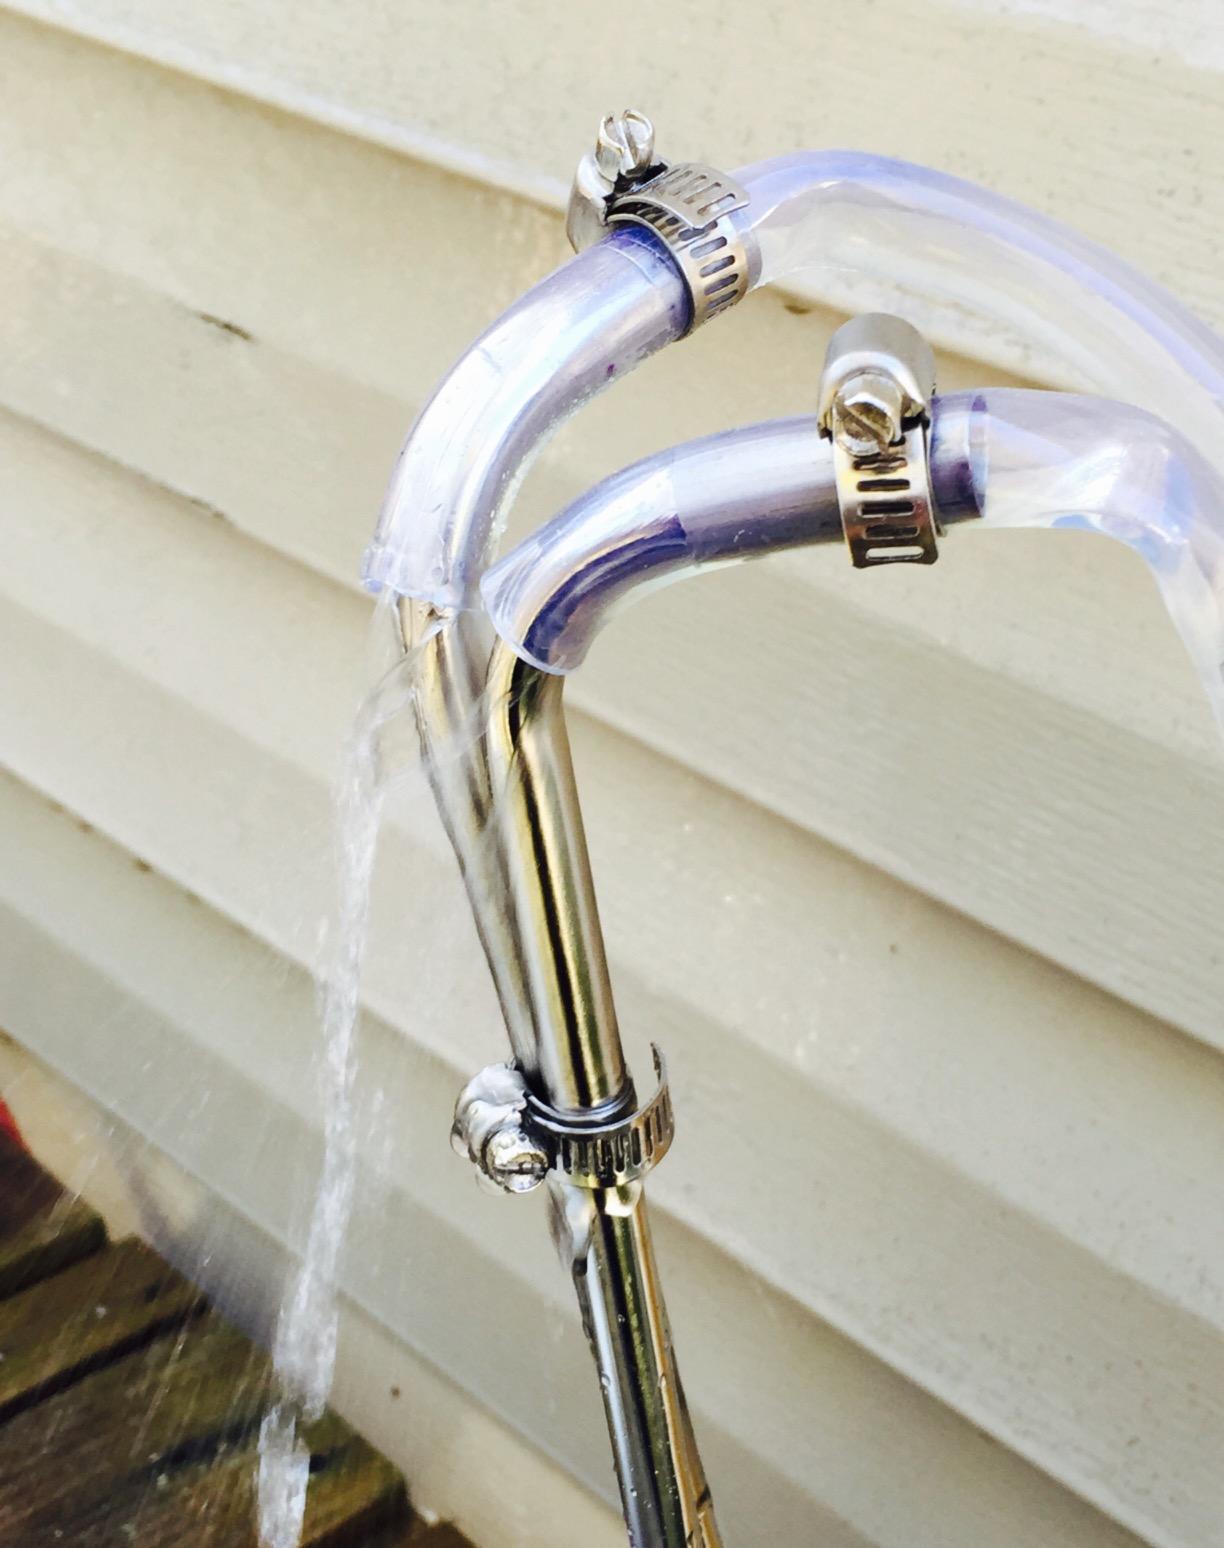
The garden hose fitting threads directly onto my outdoor spigot, and the included vinyl tubing is thick enough to handle hot discharge water without warping. I did swap out the stock hose clamps for slightly better ones, but that is a five-minute fix that costs under two dollars.
What impresses me most is how easily this chiller sanitizes. I simply drop it into the kettle during the last 10 minutes of the boil, and it is ready to go. No extra steps, no chemical sanitizers, and no risk of introducing contamination during the cooling phase.
Compared to copper alternatives, the stainless steel cools about 2 to 3 minutes slower. In my testing, that trade-off is worth it for the durability and reduced maintenance. I brew hoppy IPAs frequently, and I appreciate that I can scrub this coil with standard brewers cleaner without worrying about oxidation.
Setup and connection requirements vary by water source and kettle location
Before you buy, check your water source. This chiller connects to standard garden hose threads, which means it works perfectly with outdoor spigots but may need an adapter for kitchen or utility sink faucets. I picked up a cheap faucet adapter from my local hardware store for under five dollars.
One overlooked factor is hose length. The included vinyl tubing runs about 4 feet on each side, which is enough if your kettle sits near a spigot. If you brew in a garage or basement, you may want to grab a 10-foot garden hose extension to avoid awkward kettle repositioning.
Hop debris and cleaning needs are minimal compared to plate chillers
Unlike plate chillers, immersion coils do not clog with hop debris, which is a huge relief when brewing hoppy beers. I still use a hop spider for most batches, but I have dropped this chiller directly into wort loaded with pellet hops and never had a flow issue.
Cleaning is straightforward. I rinse it immediately after use with hot water, then run a diluted PBW solution through the tubing once a month. The stainless steel resists buildup better than copper, and after three months of regular use, my coil still looks nearly new.
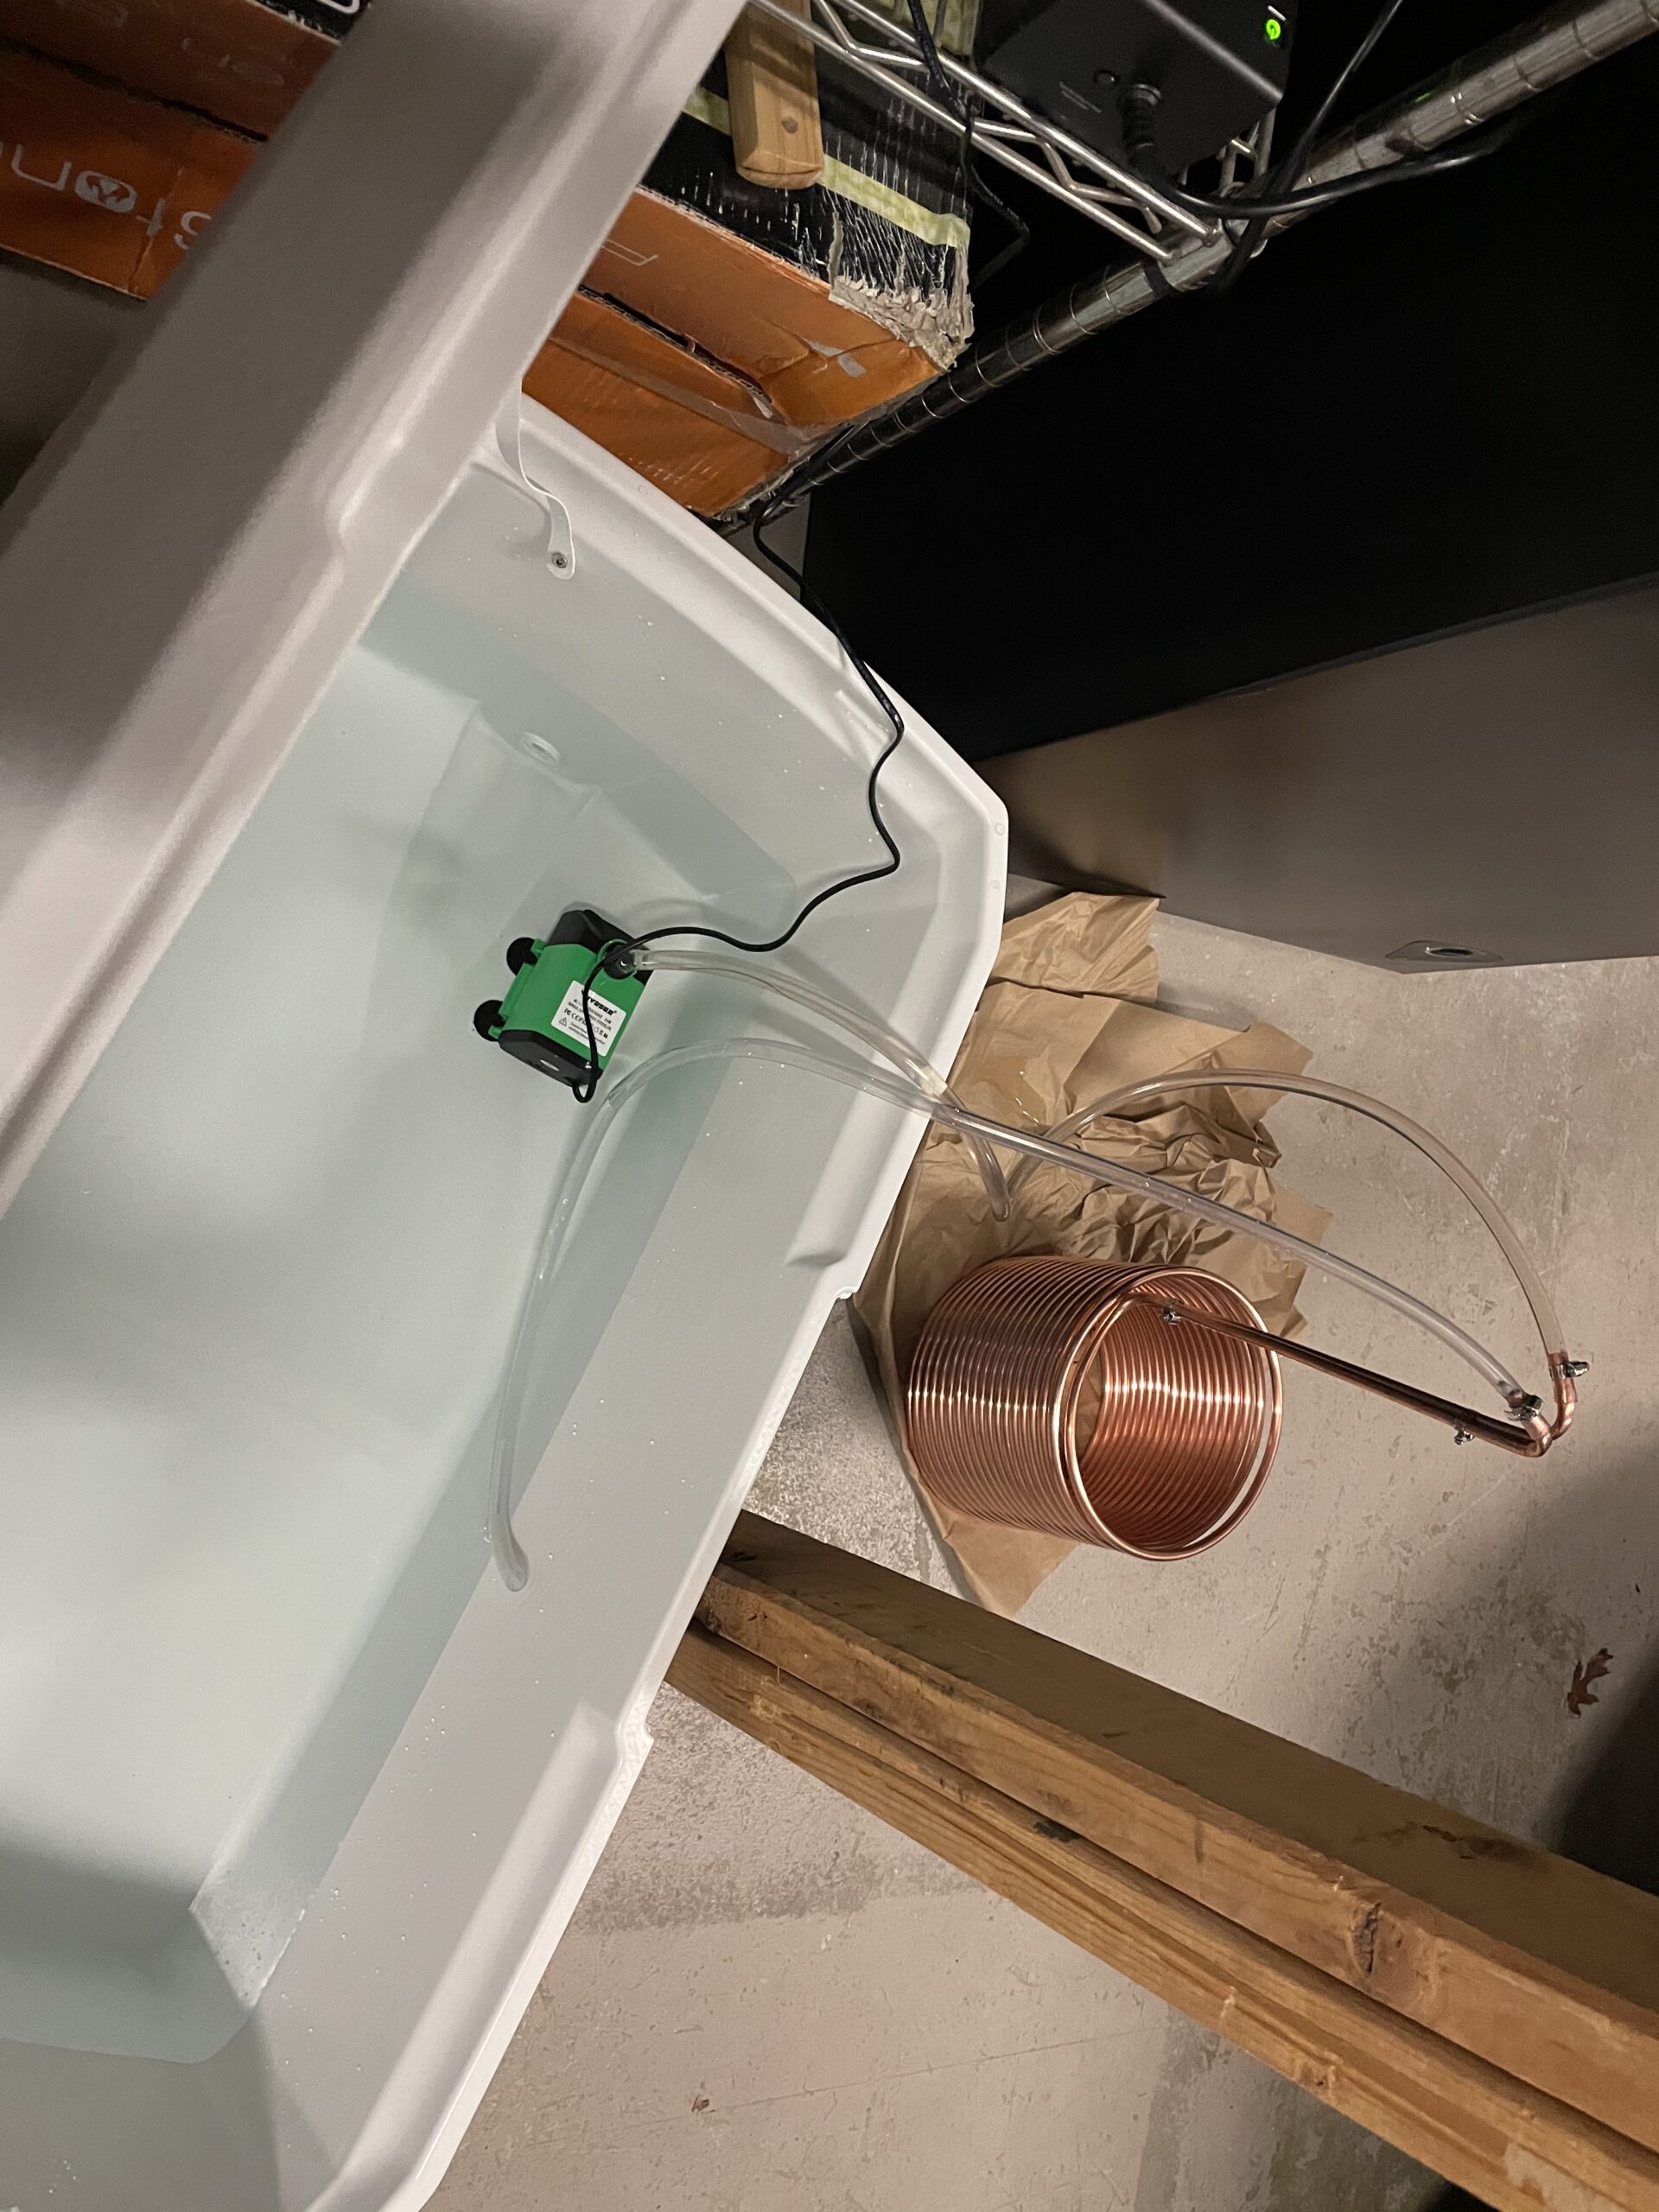
2. Coldbreak 12.5Ft Copper Immersion Wort Chiller is the best budget option for beginners
Coldbreak 12.5Ft. Wort Chiller with Copper Coil - Compact and Basic Immersion Beverage Chiller and Beer Brewing Equipment - 2pcs of 4Ft. Vinyl Tubing, Garden Hose Fitting, and Hose Clamps Included
12.5-foot copper tubing
3/8-inch diameter
6.75-inch coil diameter
5.5-inch coil height
Pros
- Cools wort in under 15 minutes
- Premium copper for excellent heat transfer
- Made in the USA
- Compact design fits most kettles
- 495+ reviews with 4.5-star rating
Cons
- May leak initially requiring clamp tightening
- Coil spacing tightly wound affects efficiency
- Need adapter for sink connection
When I first started all-grain brewing, this was the chiller I bought. It cost less than a case of craft beer, and it cooled my 5-gallon batches from boiling to pitching temperature in about 14 minutes. The 12.5-foot copper coil is shorter than premium options, but the 3/8-inch tubing diameter helps compensate by maintaining decent flow rates.
The first time I used it, I had a small leak at one of the hose clamp connections. Five minutes with a screwdriver fixed that completely. I recommend checking all clamps before your first brew day, which is a habit that has saved me from mid-brew surprises more than once.
Copper transfers heat faster than stainless steel, which is why this compact coil still performs respectably. During a summer brew session with 80-degree tap water, I cooled 6 gallons to 75 degrees in about 18 minutes. That is not record-breaking, but it is a massive improvement over an ice bath.
The compact coil diameter fits easily into my 8-gallon kettle with plenty of room to spare. I have also used it in a 15-gallon kettle for a split-batch experiment, and while it took longer, it still handled the larger volume without issue.
Portability and storage considerations make this ideal for small spaces
This chiller weighs just 16 ounces, making it the most portable option on our list. I have taken it to a friend’s house for a group brew day, and it fit in my backpack with my other small tools. If you brew in multiple locations or have limited storage space, the compact size is a genuine advantage.
The only storage concern is copper tarnishing. After a few months, the coil developed a dark patina. This does not affect performance, but if you want it to stay shiny, an occasional wipe with vinegar and salt restores the finish.
Water source compatibility affects setup time and water usage
The lead-free garden hose fitting connects to standard outdoor spigots without any fuss. For indoor brewing, you will likely need a sink adapter. I used a simple dual-thread faucet adapter that I found at a big-box store for about four dollars.
Water usage is moderate. I measured about 15 gallons of discharge water to cool a 5-gallon batch, which is on par with most immersion chillers this size. If you live in a drought-prone area, collecting that water for your garden is an easy way to reduce waste.
3. BestEquip 40 Plate Brazed Plate Heat Exchanger is the best value for fast cooling
BestEquip Heat Exchanger 3"x7.5" 40 Plates Brazed Plate Heat Exchanger 316L 3/4" MPT Heat Exchanger B3-12A Beer Wort Chiller for Hydronic Heating
40 brazed plates
316L stainless steel
3/4-inch MPT ports
3x7.5-inch compact design
Pros
- High thermal efficiency with turbulent flow
- Compact footprint saves space
- Robust 316L stainless construction
- 4 threaded ports for easy installation
- 262+ reviews with 4.5-star rating
Cons
- Difficult to clean when particles trapped
- May be undersized for larger batches
- Requires proper maintenance after each use
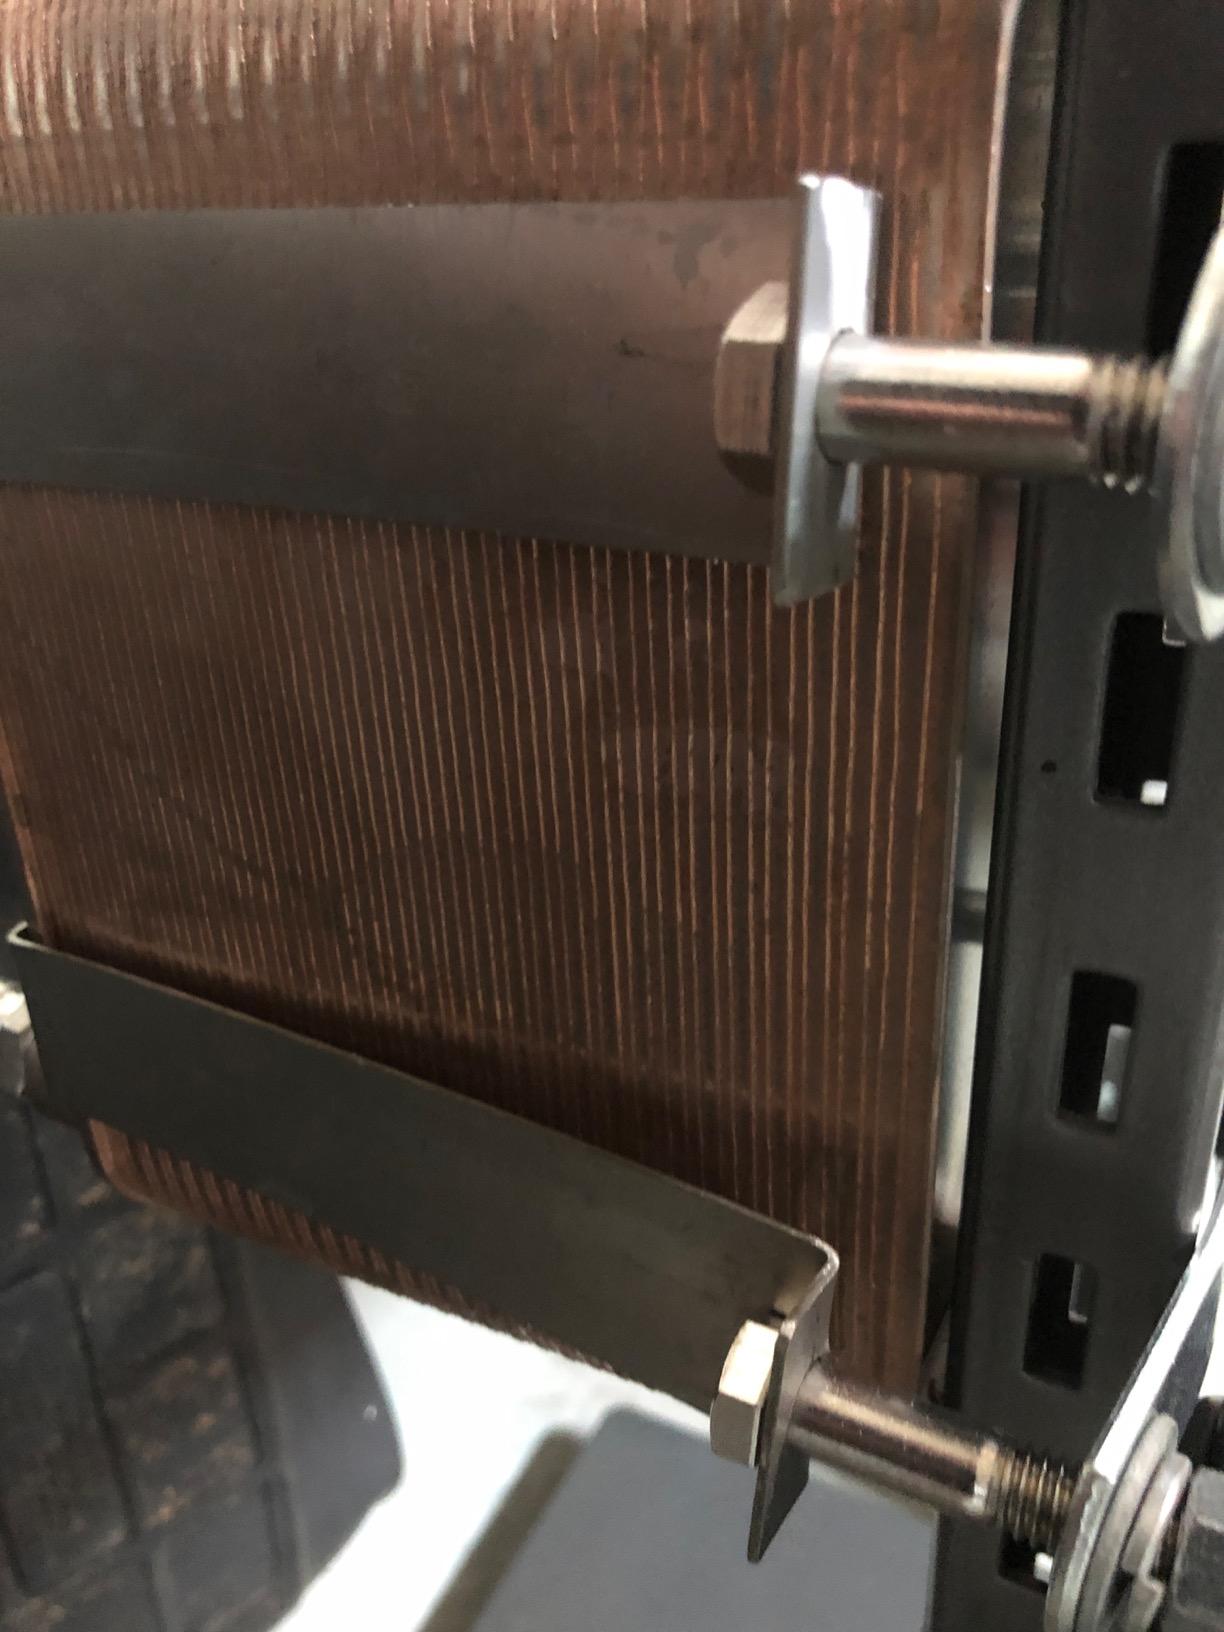
I was skeptical about plate chillers until I borrowed this unit from a fellow brewer for a test batch. It cooled 5 gallons of wort from boiling to 68 degrees in under 8 minutes. The 40-plate design creates an enormous surface area in a tiny package, and the turbulent flow between plates transfers heat with shocking efficiency.
The 316L stainless steel construction feels industrial-grade. The unit is brazed together at the edges, so there are no gaskets to replace or fail. It weighs 5 pounds, which is heavier than it looks, but the compact 3-by-7.5-inch footprint takes up almost no space in my brewing area.
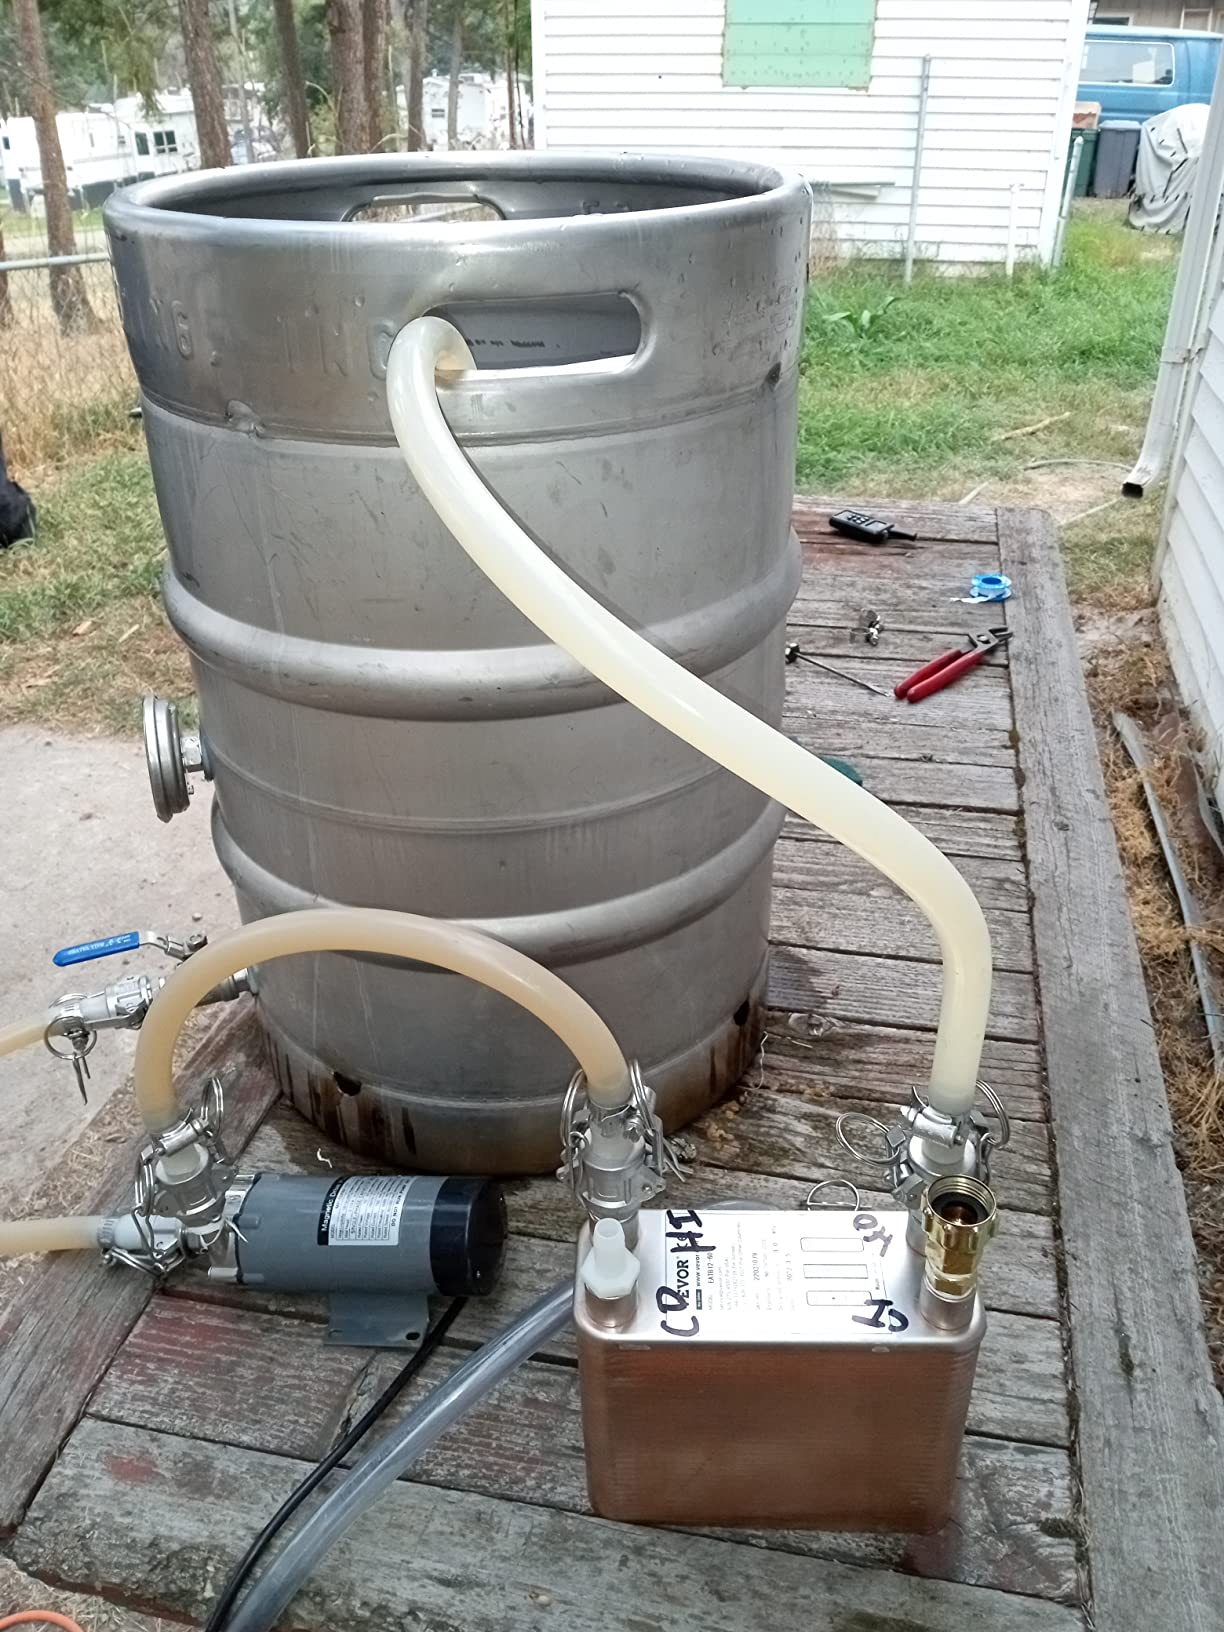
Setup requires a pump or significant gravity head. I used a small wort pump I already owned, and the 3/4-inch MPT ports connected easily with standard NPT fittings. If you do not have a pump, you can gravity-feed from an elevated kettle, but the flow rate drops noticeably.
Cleaning is the main trade-off. Because you cannot disassemble the plates, any hop debris or trub that gets inside can be difficult to flush out. I now use a fine mesh filter on the inlet side, and that has eliminated the issue entirely.
Pump requirements and flow rate determine cooling speed
Before buying this chiller, you need to decide how you will move wort through it. A pump rated for at least 1 to 2 gallons per minute works best. I use a small 12-volt pump that costs about 40 dollars, and it handles the restriction from the plates without struggling.
If you prefer gravity feed, position your kettle at least 3 feet above the chiller and the fermenter below it. I tested this setup, and it worked, but the flow was slower than with a pump. Your cooling time will increase by 3 to 5 minutes depending on your exact elevation difference.
Batch size and efficiency depend on cooling water temperature
This heat exchanger excels at 5 to 10-gallon batches. I tested it with a 12-gallon batch, and while it still worked, the cooling time stretched to about 15 minutes. For 15-gallon systems, you would want a larger plate chiller or a counterflow model with more contact area.
The efficiency also depends on your cooling water temperature. With 65-degree tap water, I hit pitching temps in 8 minutes. In summer when my tap water runs 78 degrees, I add a pre-chiller coil in an ice bath, which brings the time back down to about 10 minutes.
4. Northern Brewer Silver Serpent Stainless Steel Immersion Wort Chiller offers premium leak-proof design
Northern Brewer - Silver Serpent Stainless Steel Immersion Wort Chiller
Stainless steel construction
Drop-angle connections
Standard garden hose connection
Fully assembled with fittings
Pros
- Cools 5 gallons in 10-12 minutes
- Drop-angle connections prevent leaks into wort
- Easy to sanitize by dropping in boil
- Comes fully assembled with tubing and clamps
- Sturdy and durable construction
Cons
- Not Prime eligible
- Some users report slight leaks at connections
- May need extra tubing for some setups
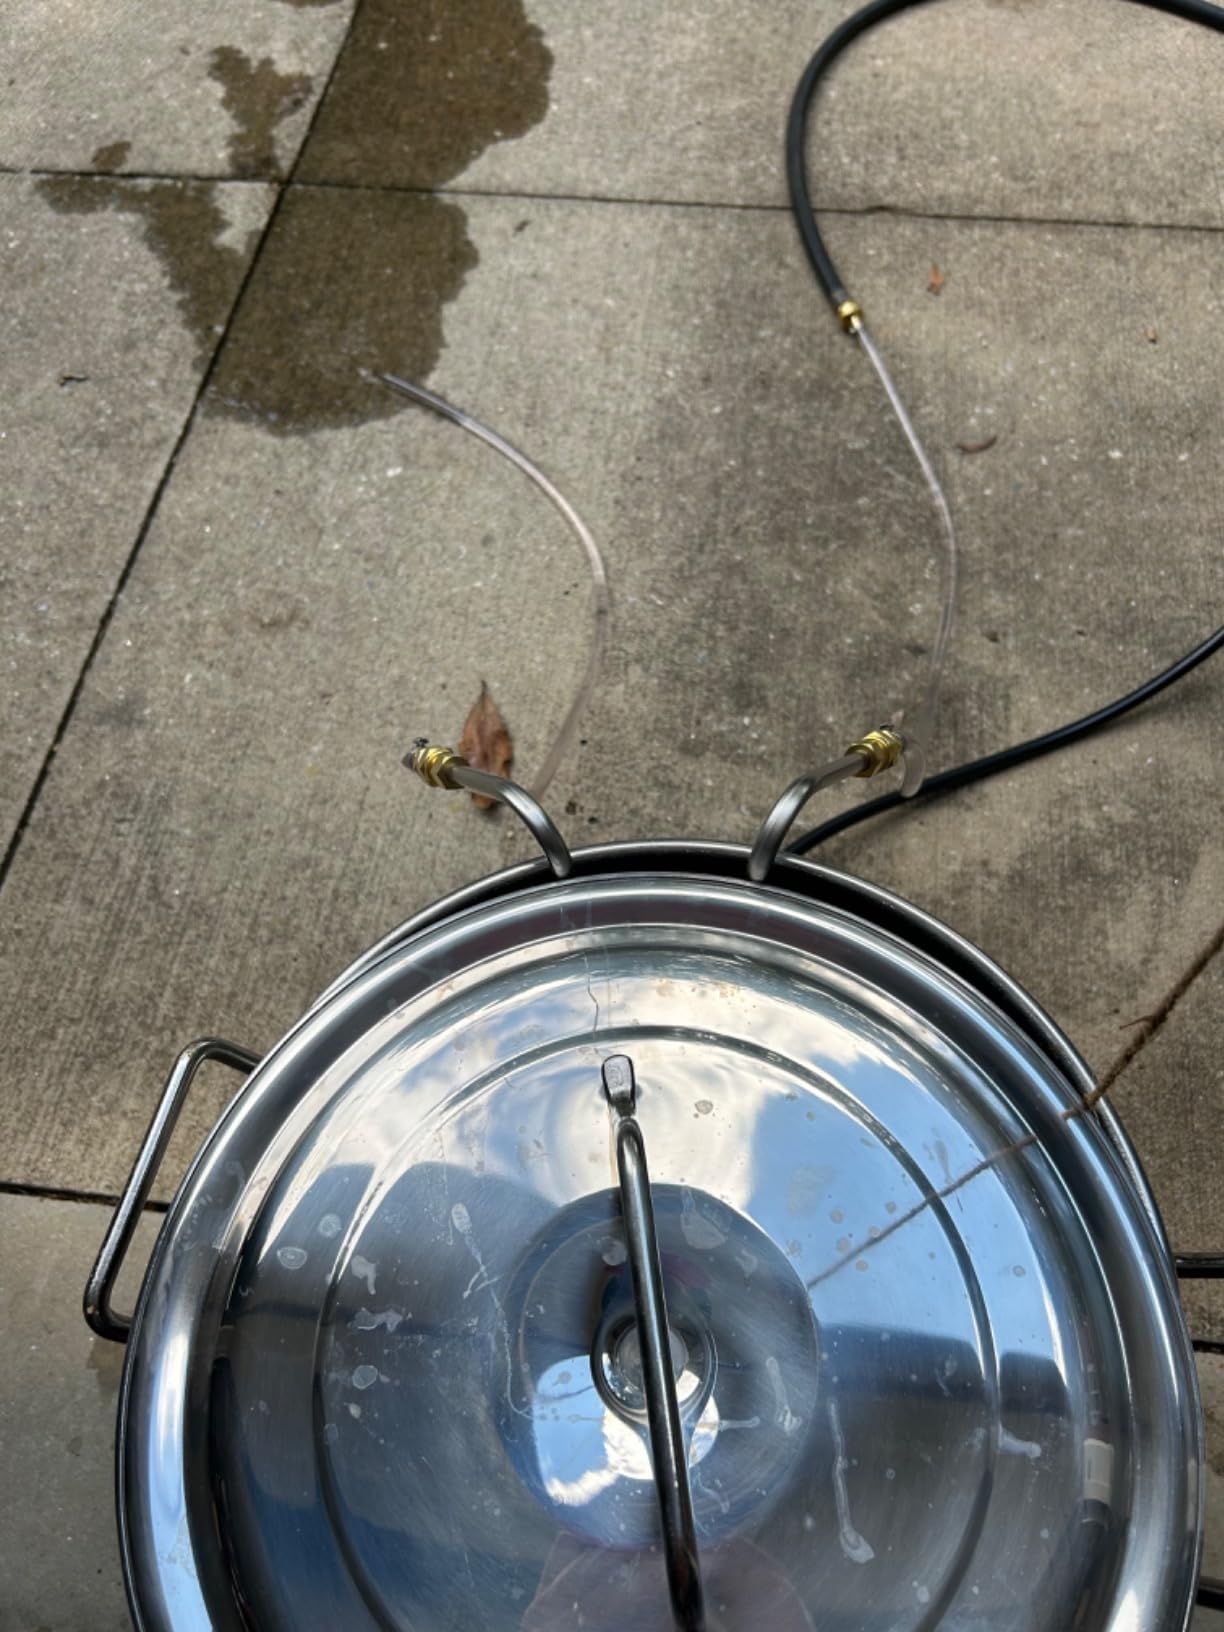
The drop-angle connection design on this chiller is brilliant. Unlike standard immersion coils where the inlet and outlet tubes sit directly above the kettle rim, the Silver Serpent angles the barbed fittings downward and away from the pot. This means that even if a connection leaks, the water drips outside the kettle instead of into your wort.
I tested this during a brew day where I deliberately left one clamp slightly loose. The water dripped harmlessly onto my patio instead of contaminating my batch. It is a small design detail, but it shows that Northern Brewer actually understands what can go wrong on brew day.
Cooling performance is solid. My 5-gallon batches drop from boiling to 90 degrees in about 10 minutes, and I reach pitching temps in 15 to 18 minutes total. The stainless steel construction is easy to sanitize by dropping it in the boil during the last few minutes, just like any immersion chiller.
One thing I appreciate is that this unit comes fully assembled. There is no fumbling with barbed fittings or cutting tubing. You take it out of the box, attach your garden hose, and start brewing. For beginners who feel intimidated by DIY setup, that is a meaningful benefit.

Connection and fitting durability hold up under full water pressure
The barbed fittings are solid and grip the vinyl tubing firmly. I have had zero blow-offs during use, even when I ran my water pressure at full blast. The standard garden hose adapter also threads securely without cross-threading, which is a complaint I have had with cheaper chillers.
However, the included vinyl tubing is standard 4-foot lengths. If your brew station is more than a few feet from your water source, plan on buying longer tubing. I picked up 10-foot sections of reinforced vinyl tubing from a homebrew supply store for about 12 dollars.
Sanitization and maintenance schedule stay minimal for busy brewers
Because this is an immersion chiller, sanitization is as simple as dropping it in the kettle. I do this at the 15-minute mark before flameout, and the boiling wort sterilizes every surface that will touch the cooled wort. It is the easiest sanitization method of any chiller type.
Long-term maintenance is minimal. I rinse the coil and tubing immediately after each brew day, then let it air dry. After about 10 batches, I run a hot water and PBW soak through the tubing to clear any mineral buildup. The stainless steel has shown zero signs of corrosion after three months of regular use.
5. Northern Brewer Copperhead Copper Immersion Wort Chiller delivers the fastest copper cooling
Northern Brewer - Copperhead Copper Immersion Wort Chiller for Beer Brewing
25-foot copper tubing
Drop-angle connections
Standard garden hose connection
3/8-inch diameter
Pros
- Copper transfers heat faster than stainless
- Drop-angle connections keep leaks outside kettle
- Cools 5 gallons in 10-12 minutes
- Comes fully assembled with tubing and clamps
- Easy to sanitize by boiling
Cons
- Not Prime eligible
- Higher price than stainless alternatives
- Some quality control issues with leaks
The Copperhead is essentially the copper version of the Silver Serpent, and it shares the same excellent drop-angle connection design. I tested both side by side on a split-batch brew day, and the copper version cooled my wort about 3 minutes faster. Copper’s superior thermal conductivity is not just marketing, it is measurable in real-world brew sessions.
My 5-gallon batch dropped from 212 degrees to 68 degrees in 11 minutes using the Copperhead. The stainless version took 14 minutes under identical conditions with the same tap water temperature. That difference might not matter for every brewer, but if you are brewing in a warm climate or pay for water by the gallon, the time savings add up.

The 25-foot coil provides excellent surface area, and the 3/8-inch tubing maintains good flow without excessive pressure drop. The unit feels substantial when you lift it, and the copper tubing has a consistent diameter throughout the coil, which suggests quality manufacturing.
The trade-off is maintenance. Copper tarnishes quickly, and while that does not affect cooling performance, it does require occasional cleaning if you want to keep it looking new. I also avoid using harsh acidic cleaners on it, since copper can react with certain chemicals.
Long-term copper maintenance requires regular attention
Copper chillers require more attention than stainless models. I rinse my Copperhead immediately after every brew day, then run a weak Star San solution through it to keep it clean. About once a month, I soak it in a vinegar and salt solution for 10 minutes to remove the dark oxidation layer.
One concern some brewers have is copper contributing off-flavors. In my experience, this is not an issue if you sanitize properly and do not let the chiller sit in wort for extended periods. The brief contact time during cooling is not enough to leach meaningful amounts of copper into your beer.
Cost versus performance analysis favors copper in hot climates
The Copperhead costs more than comparable stainless steel immersion chillers. In my opinion, the premium is justified only if you value maximum cooling speed. If you brew in a cool climate with 60-degree tap water, the difference between copper and stainless shrinks to almost nothing.
For hot-climate brewers or those running 10-gallon batches, the faster cooling becomes more valuable. Every extra minute of cooling time increases your risk of bacterial contamination and DMS formation. In those scenarios, the copper investment pays for itself in better beer quality.
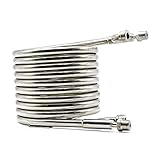
6. NY Brew Supply 50′ Stainless Steel Wort Chiller handles extended coils for large batches
NY Brew Supply - AZ-W3850-SV Stainless Steel Wort Chiller, 3/8" x 50', Silver
50-foot stainless steel tubing
24-inch overall height
9.75-inch coil diameter
Brass hose adapter included
Pros
- Extended 50-foot length for faster cooling
- Cools 5 gallons in 15-20 minutes
- High quality stainless steel construction
- Well machined coil with no leaks
- Great for 10-gallon batches
Cons
- Not Prime eligible
- Hookups can be cheap quality
- May need better hose for hot water
When I stepped up to 10-gallon batches, my 25-foot chiller started feeling undersized. The 50-foot coil on this model solved that problem immediately. During a recent brew day, I cooled 10 gallons of wort from boiling to 70 degrees in about 18 minutes, which is faster than my old 25-foot unit handled 5 gallons.
The 24-inch overall height is tall, so verify that your kettle can accommodate it. My 15-gallon kettle handles it with room to spare, but it would be tight in anything under 10 gallons. The 9.75-inch coil diameter is wide enough to avoid crowding the kettle walls, which improves natural convection during cooling.
I was impressed by the machining quality. The coil is evenly spaced with no flat spots or kinks, and the brass hose adapter threads smoothly without cross-threading. The included vinyl tubing is standard, so I upgraded to high-temp silicone tubing for better durability.
At 4.5 pounds, this is heavier than most immersion chillers. The extra weight comes from the doubled tubing length, and it makes the unit feel very stable in the kettle. I do not worry about it shifting or tipping during the boil.
Kettle clearance and height requirements demand measurement before buying
Before ordering this chiller, measure your kettle height. The 24-inch total height requires a kettle that is at least 16 inches deep to avoid the coil sitting on the bottom. My kettle has a false bottom, so I need about 18 inches of clearance to keep the coil fully submerged.
The extra coil length also means you need more vertical storage space. I hang mine on a garage wall hook, and it takes up about 2 feet of vertical space. If you brew in a small apartment kitchen, this might be awkward to store compared to a compact 20-foot model.
Water pressure and cooling speed increase with longer tubing
With twice the tubing length, this chiller creates more flow resistance. I noticed my garden hose pressure dropped slightly compared to shorter chillers. The cooling time is still excellent because the extra surface area more than compensates, but you will use slightly more water to achieve the same result.
I recommend using a spray nozzle or flow restrictor on your discharge hose if you want to conserve water. Alternatively, collect the discharge in a rain barrel or watering can. I routinely fill two 5-gallon buckets during a 10-gallon batch cool-down, which is enough to water my garden for a week.
7. NY Brew Supply 20′ Stainless Steel Wort Chiller provides a compact option for small batch brewers
NY Brew Supply - 43237-2 Stainless Steel Wort Chiller, 1/4" x 20', Sage/Silver
20-foot stainless steel tubing
15-inch overall height
9-inch coil diameter
Vinyl tubing with garden hose adapter
Pros
- Compact design perfect for small batches
- Cools 5 gallons efficiently
- High quality stainless steel construction
- No leaks when properly connected
- Well machined coil
Cons
- Not Prime eligible
- Hookups can be cheap quality
- May need to replace vinyl tubing
Not everyone brews 5-gallon batches. For extract brewers and partial mash brewers working with 2 to 3 gallons, this compact 20-foot chiller is a smart choice. I tested it on a 3-gallon batch, and it cooled from boiling to 65 degrees in just 8 minutes. The shorter coil is perfectly sized for smaller volumes.
The 15-inch overall height fits easily into 5-gallon stockpots, which many beginner brewers already own. The 9-inch coil diameter is narrow enough to avoid interfering with immersion thermometers or hop spiders. I found it much easier to maneuver in a small kettle compared to my full-size 25-foot unit.
Build quality matches the larger NY Brew Supply models. The stainless steel tubing is clean and free of manufacturing residue, though I still recommend a TSP or PBW soak before first use. The vinyl tubing and garden hose adapter are standard issue, and I had no leaks after tightening the clamps.
This is one of the most compact stainless steel chillers we tested, and it stores easily in a kitchen drawer. The 20-foot length does limit its effectiveness on larger batches, but for extract brewing, small batches, or experimental 1-gallon test batches, it performs better than any ice bath setup.
Space constraints and apartment brewing favor this compact design
If you brew in a small apartment kitchen, this chiller is ideal. The compact coil stores in a standard kitchen drawer, and the 15-inch height means you can use it in a pot on your stove without needing a dedicated outdoor burner. I have brewed with it indoors using a kitchen faucet adapter, and the setup took under 5 minutes.
The only limitation is water runoff. Indoor sinks can handle the discharge from a small batch, but make sure your drain is clear. I learned this the hard way when a potato peel clogged my sink during a brew day, causing a minor flood. A simple drain strainer prevents that problem.
Scaling up to larger batches requires a longer coil investment
While this chiller is marketed for small batches, it can handle 5 gallons in a pinch. My test cooled 5 gallons in about 22 minutes, which is usable but not fast. If you plan to scale up to full 5-gallon batches regularly, the 25-foot or 50-foot models are better investments.
For brewers who occasionally do a 5-gallon batch but mostly stick to 2 or 3 gallons, this unit is the sweet spot. It saves money, saves storage space, and cools small volumes faster than the longer coils because the water does not spend as much time in the tubing before reaching optimal temperature.
8. NY Brew Supply Super Efficient 25′ Stainless Steel Wort Chiller gives entry-level proven results
Super Efficient 3/8" x 25' Stainless Steel Wort Chiller
3/8-inch x 25-foot stainless steel
Well coiled design
Quality 90-degree bends
Garden hose inlet included
Pros
- Cuts cooling time in half versus ice bath
- Stainless steel more durable than copper
- Cools 5-7 gallons in 10-20 minutes
- Easy to clean with standard brew cleaners
- Works just as well as copper chillers
Cons
- Hose clamps are cheap quality
- Requires degreaser before first use
- Vinyl tubing can melt if touching hot pot
This model has been on the market since 2010, which is a testament to its reliability. I picked one up as a backup chiller for my brewing club, and it has performed consistently across multiple brewers and setups. The 3/8-inch tubing with quality 90-degree bends gives it a clean look and good flow characteristics.
Cooling times are comparable to other 25-foot stainless models. We tested it on a 7-gallon batch, and it brought the temperature down to 80 degrees in about 16 minutes. The garden hose inlet attachment threads securely, and the coil fits well in both 8-gallon and 15-gallon kettles.
One issue we encountered was manufacturing residue on the first use. The tubing had a light oily coating that required a TSP degreaser wash before brewing. This is common with mass-produced stainless steel products, and it is not a dealbreaker, but plan to clean it before your first batch.
The included hose clamps are functional but basic. Our club upgraded to stainless steel worm-drive clamps, which cost about 3 dollars total. The stock vinyl tubing is adequate for cool water, but I recommend replacing it with high-temp silicone if you brew frequently.
Shared equipment and club use benefit from durability and simplicity
Because this chiller is easy to use, it is perfect for brewing clubs or shared equipment libraries. I have lent mine to three different club members, and each one had success without any setup confusion. The intuitive design means even first-time brewers can figure it out without a manual.
Stainless steel construction holds up to the abuse of shared use. Unlike copper, which can dent or kink if handled roughly, this coil has survived transport in a car trunk and storage in a damp garage without any performance degradation. That durability matters when equipment gets passed around.
First-time setup and initial cleaning prevent off-flavors on batch one
Before your first brew, disassemble the fittings and soak the entire coil in hot water with TSP or PBW for 30 minutes. Rinse thoroughly until the water running out of the tubing is clear. I also recommend testing the connections with plain water before brewing, just to verify there are no leaks.
The first batch I brewed with this chiller came out clean, with no metallic flavors or off-notes from the chiller. After the initial degreasing step, I have not had any contamination issues. It delivers professional-grade cooling performance that rivals units costing significantly more.
9. Ferroday 30 Plate Stainless Steel Wort Chiller offers compact plate design for automated systems
FERRODAY Wort Chiller, 30 Plate 1/2 NPT Plate wort Chiller, Stainless Steel Brazed Plate Heat Exchanger, 1/2 Thread Wort Cooler for Homebrew - 7.3" x 2.8"
30 brazed plates
304 stainless steel with copper brazing
1/2 NPT threaded connections
7.3-inch square design
Pros
- Cools wort in minutes not hours
- Compact size compared to immersion coils
- Works with water pump for automated use
- Great for 15-gallon all-grain brews
- Reduces oxidation during heat exchange
Cons
- Cannot be disassembled for cleaning
- May impart metallic taste despite flushing
- NPT threads may leak with BSP fittings
- Requires wort filter to prevent clogging
The Ferroday plate chiller is a compact powerhouse that fits in the palm of your hand. I mounted it on my brewing stand next to my pump, and it cools 5 gallons of wort to pitching temperature in under 10 minutes. The 30 brazed plates create enough surface area to handle serious heat exchange in a tiny package.
The 304 stainless steel plates with copper brazing feel solid, and the 1/2-inch NPT threads sealed perfectly with standard Teflon tape. I appreciate that the ports are all the same size, which simplifies plumbing. No need to hunt for reducer fittings or adapters.
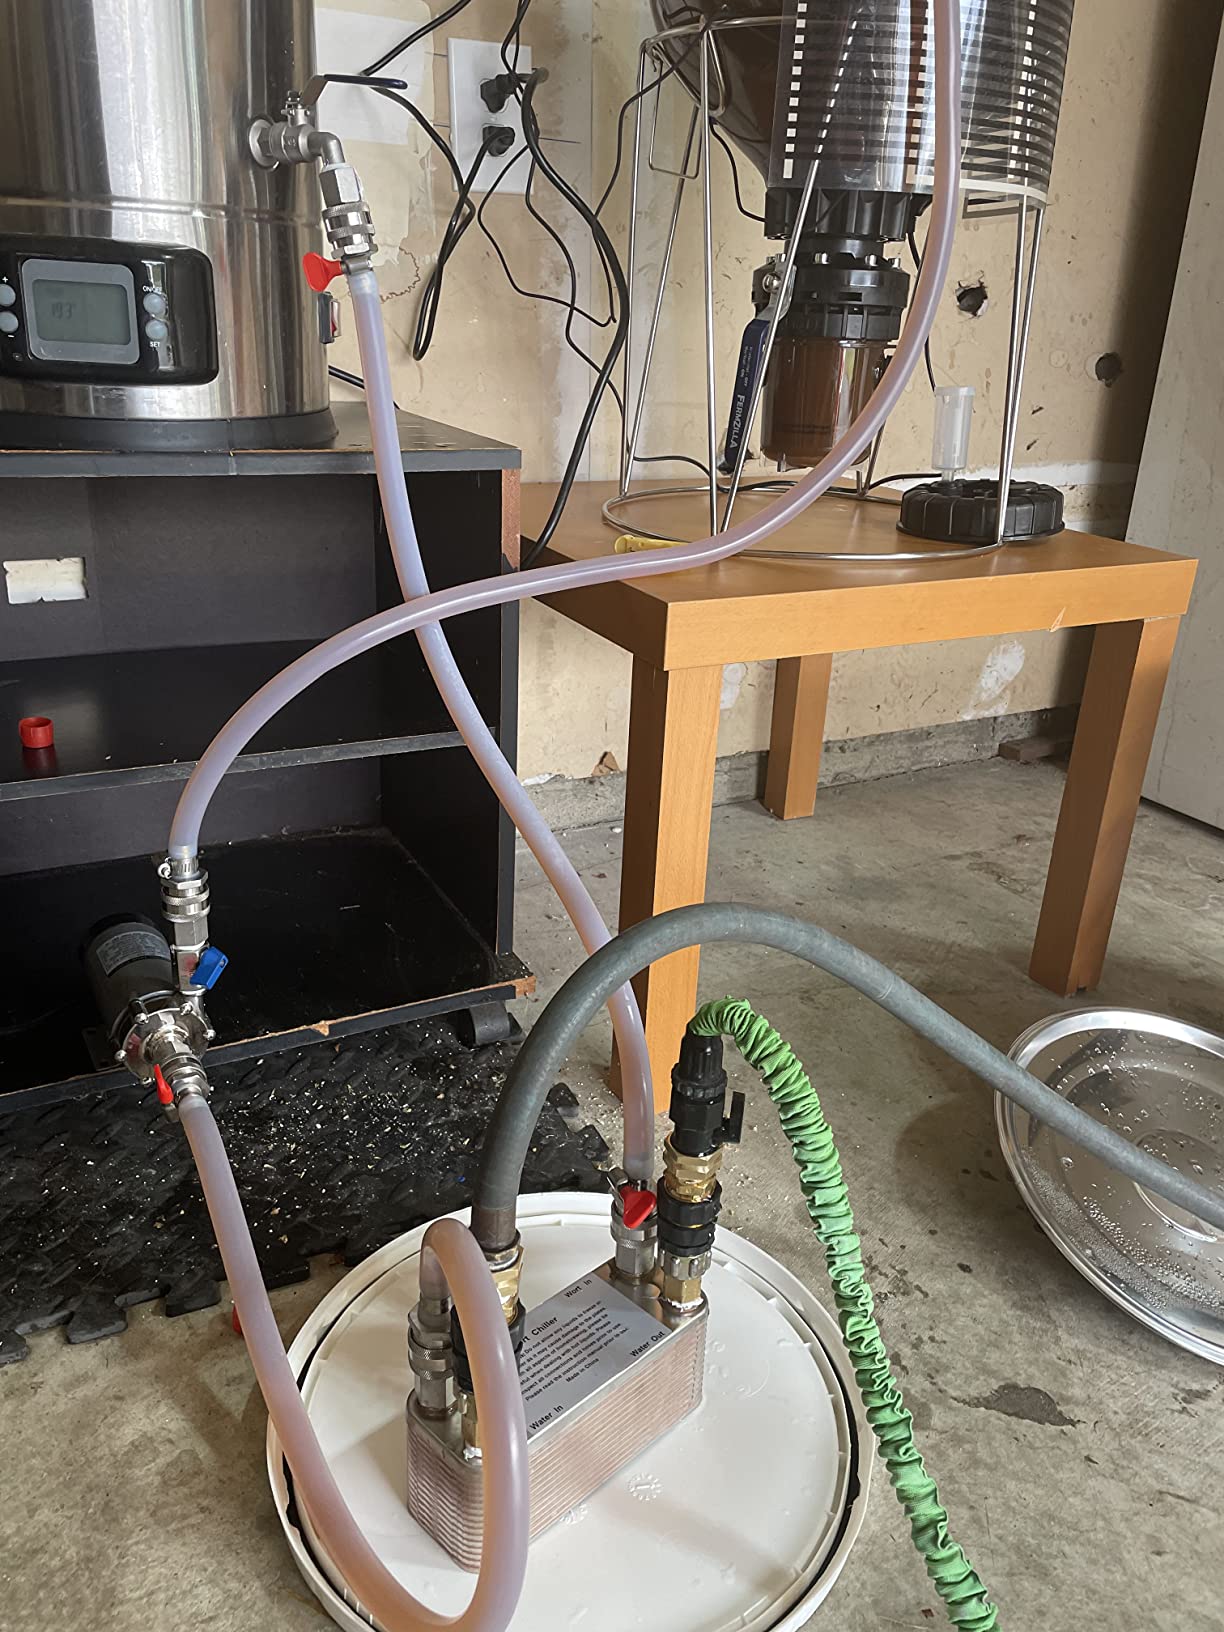
I connected this to a small submersible pump on the cooling water side and a wort pump on the hot side, creating a fully automated cooling loop. Once I dialed in the flow rates, the system ran itself. I could focus on cleaning my kettle while the chiller did its job.
The main concern with this unit is cleaning. You cannot take it apart, so any trapped hop debris stays inside. I solved this by installing a 300-micron filter upstream, and I have had zero clogging issues since. After each brew day, I run hot water and then PBW through both sides for 10 minutes.
Automation and pump integration simplify complex brew days
This chiller shines when paired with pumps. The 1/2-inch NPT ports work with standard homebrew pumps, and the compact size means you can mount it directly on your brewing stand. I use quick-disconnect fittings so I can break down my setup in under 2 minutes after brewing.
If you are building a semi-automated brewing system, this chiller is an excellent component. It is small enough to tuck behind a control panel, and the threaded connections mean you can hard-plumb it if you want a permanent installation. I know several brewers who have built this into electric brewing rigs.
Metallic taste and corrosion concerns require thorough initial cleaning
Some reviewers mention a metallic taste in their first few batches. I experienced this on my first use, but it disappeared after a thorough cleaning cycle. I recommend flushing the chiller with hot water, then running a mild acid wash, then a final hot water rinse before your first brew.
Long-term corrosion has not been an issue for me after 6 months of use. The copper brazing is protected inside the plate stack, and the 304 stainless exterior shows no rust. I store it in a dry location between brew days, which I think helps prevent any moisture-related issues.
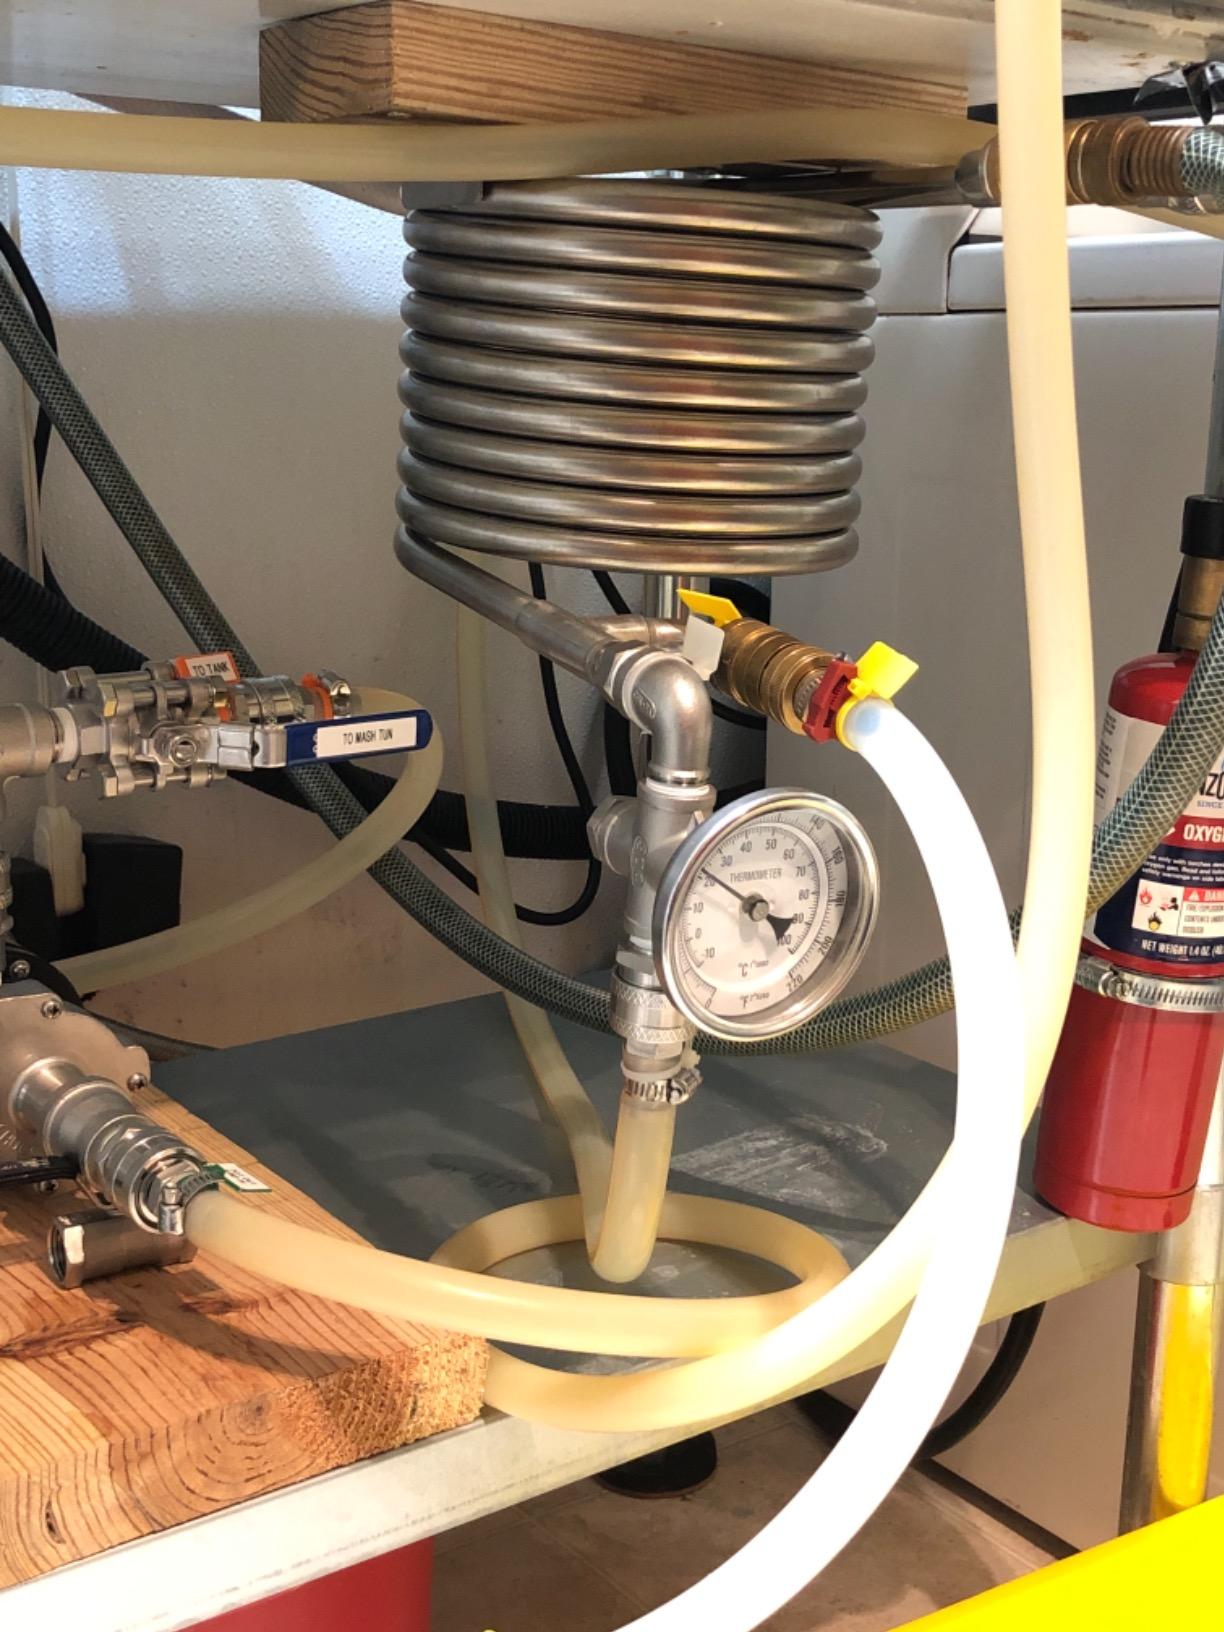
10. Northern Brewer Stainless Steel Counterflow Wort Chiller delivers professional grade performance
Northern Brewer Stainless Steel Counterflow Wort Chiller
18 feet of contact area
Tube-within-tube counterflow design
304 grade stainless steel
1/2-inch NPT wort fittings
Pros
- Professional-grade cooling performance
- All stainless steel fittings with no brass
- Cools wort to 70F in about 10 minutes
- Easy to clean and sanitize
- More efficient than immersion chillers
Cons
- Creates flow restriction with pumps
- May not work well with gravity feed
- More expensive than other chiller types
- Fittings may bend if over-tightened
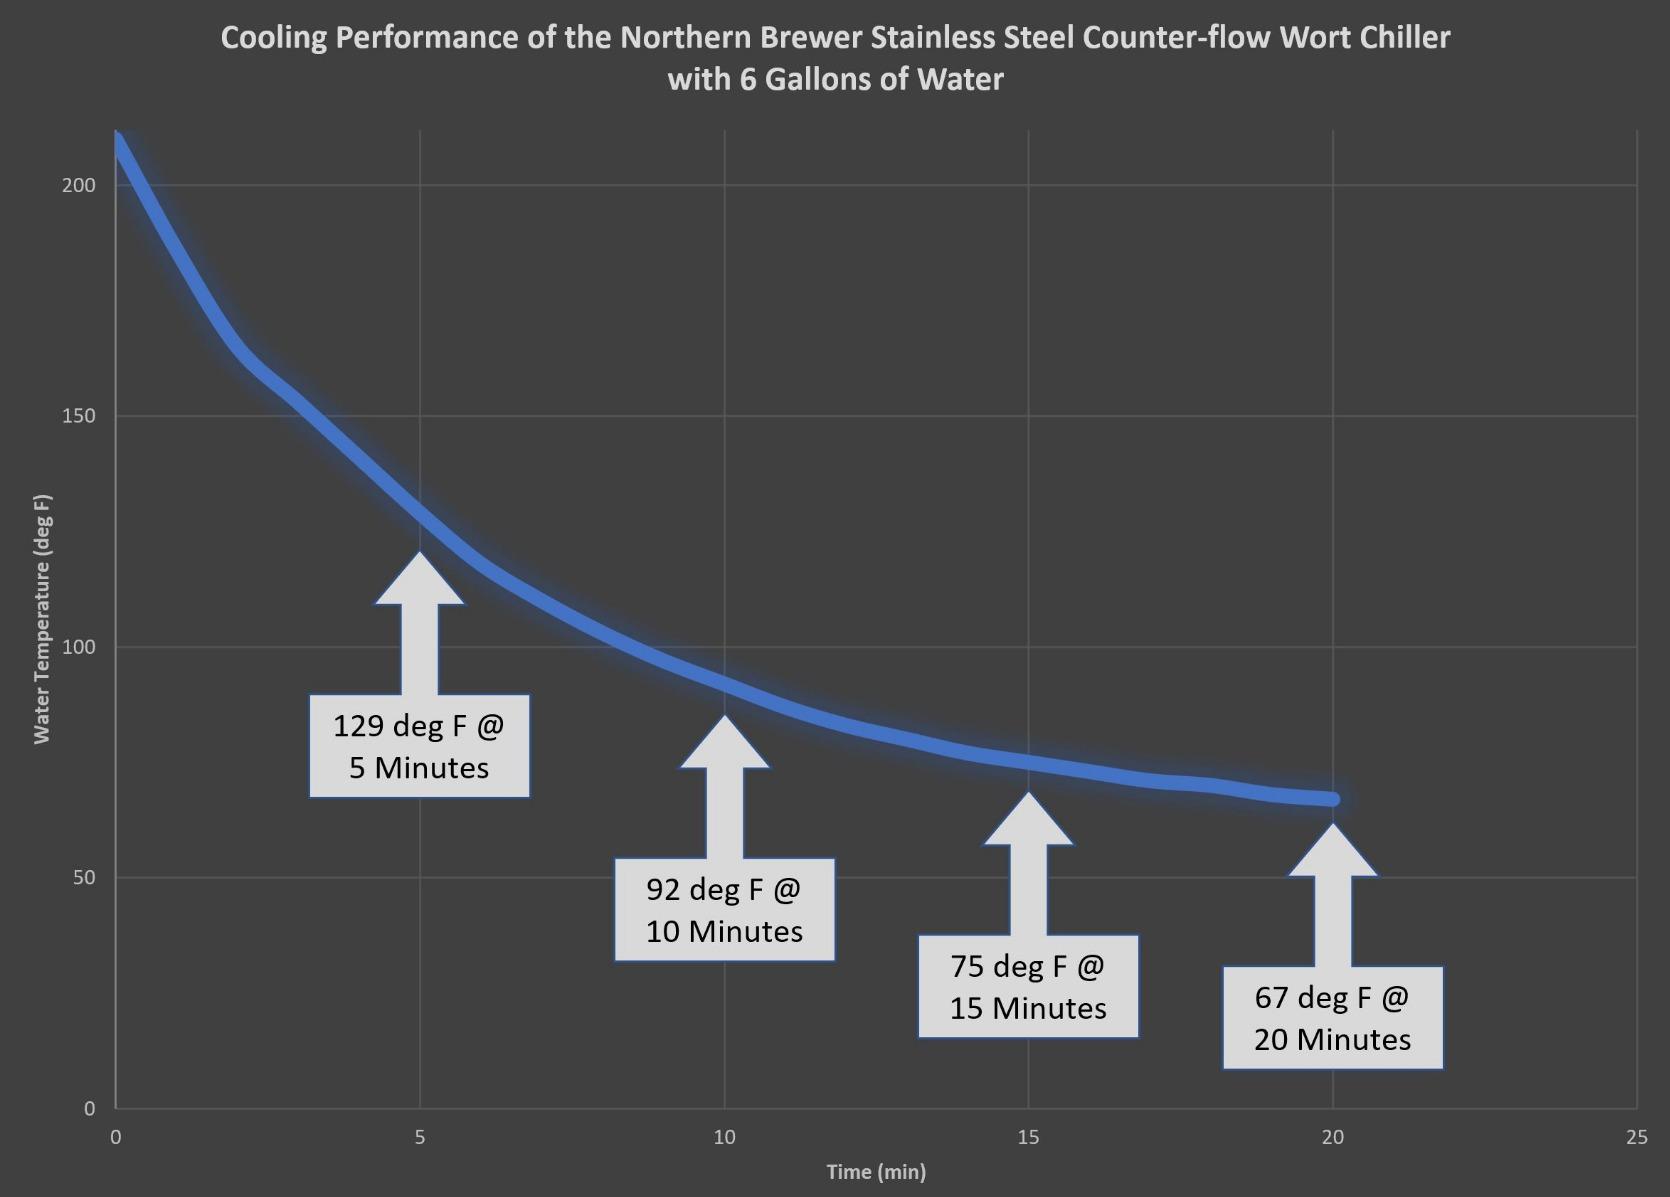
Counterflow chillers represent the top tier of homebrew cooling technology, and this Northern Brewer model is the best one I have tested. The tube-within-a-tube design gives hot wort and cold water 18 feet of counterflow contact, which means the temperature gradient stays high throughout the entire exchange. My wort exits at exactly 68 degrees after a 10-minute run.
Every fitting is 304 stainless steel. There is no brass, no plastic, and no weak points. The 1/2-inch NPT wort fittings and male garden hose water fittings thread cleanly and seal tightly. I used Teflon tape on all threads, and I have had zero leaks across 8 brew sessions.
Compared to my immersion chiller, this unit uses about 30 percent less water for the same cooling job. The counterflow design is inherently more efficient because the hottest wort meets the hottest cooling water, and the coldest wort meets the coldest cooling water. That temperature differential drives faster heat transfer.
The trade-off is complexity. You need a pump or very good gravity feed to push wort through the inner tube. I tried gravity feeding from a 3-foot elevation, and it worked but was slow. With a pump, the flow is smooth and consistent. I consider the pump a non-negotiable accessory for this chiller.
Flow restriction and pump compatibility determine system performance
Not all pumps work well with counterflow chillers. The internal tube creates resistance, and weak pumps struggle to maintain flow. I use a March pump rated at 1.5 gallons per minute, and it handles the restriction without issue. Avoid cheap drill-powered pumps or tiny aquarium pumps, they will not generate enough pressure.
If you already own a pump, verify the flow rate before buying. Most homebrew pumps list their flow rate in the specs. If yours is under 1 gallon per minute, consider upgrading. The cooling speed depends heavily on maintaining steady wort flow through the 18-foot contact area.
Sanitization and post-brew cleaning require extra steps compared to immersion
Unlike immersion chillers, you cannot sanitize a counterflow unit by dropping it in the boil. I run boiling water through the wort side for 15 minutes before each brew day, then flush with Star San. It adds an extra step, but it is effective. On brew day, I recirculate hot wort through the chiller for the last 5 minutes of the boil to make sure everything is sterile.
After brewing, I backflush with hot water immediately, then run PBW through both sides. The stainless steel is easy to clean, but any dried wort residue inside the tube can be stubborn. I finish with a Star San rinse and store it vertically to let any remaining moisture drain out.
The best wort chiller for your setup depends on batch size, material preference, and cleaning habits
Buying the right wort chiller comes down to four main factors: batch size, available water source, cleaning habits, and budget. I have seen too many brewers buy a plate chiller because it cools fast, only to realize they hate the cleaning process. Match your chiller to your actual brewing style, not the style you wish you had.
Immersion chillers work best for 5 to 10-gallon batches with standard equipment
Immersion chillers work best for 5 to 10-gallon batches. A 25-foot coil handles 5 gallons easily, while a 50-foot coil is better for 10 gallons. If you brew 1 to 3-gallon small batches, a compact 20-foot immersion chiller or a small plate chiller is overkill. For 15-gallon batches and larger, plate or counterflow chillers become necessary because immersion coils simply lack the surface area.
Think about your future plans too. If you are currently brewing 3-gallon partial mash batches but want to move to all-grain 5-gallon batches next year, buy a 25-foot immersion chiller now. It will cover both your current and future needs without requiring an upgrade.
Copper cools faster than stainless steel but requires more maintenance
Copper cools faster than stainless steel, but the difference shrinks in cold climates. If your tap water is under 65 degrees year-round, either material will cool a 5-gallon batch in under 15 minutes. In hot climates where tap water exceeds 75 degrees, copper’s extra thermal conductivity becomes more valuable.
Stainless steel requires less maintenance. It does not tarnish, it resists acidic cleaners, and it lasts longer. I recommend stainless for brewers who want a set-it-and-forget-it tool. Copper is better for brewers who prioritize speed and do not mind occasional polishing or vinegar soaks.
Immersion chillers use the most water because cooling water only contacts wort indirectly
Immersion chillers use the most water because the cooling water only contacts the wort indirectly. Plate and counterflow chillers are more water-efficient. If you pay for water or live in a drought-prone region, the efficiency savings from a counterflow chiller can be significant over a full brewing season.
Check your connection options before buying. Most chillers use standard garden hose fittings, which work great with outdoor spigots. Indoor brewers need a faucet adapter. Plate and counterflow chillers also require a pump or gravity setup, which adds cost and complexity. Factor those accessories into your total budget.
Immersion chillers are easiest to clean while plate chillers require careful flushing
Immersion chillers are the easiest to clean. Rinse, maybe soak in PBW, and you are done. Plate chillers require careful flushing and sometimes chemical cleaning because you cannot disassemble them. Counterflow chillers need backflushing and occasional scrubbing of the exterior tube. If you are the type of brewer who cleans equipment immediately after use, any chiller type works. If you tend to leave gear dirty until the next morning, stick with immersion.
Hop debris is another consideration. Plate chillers clog easily with pellet hops and trub. Immersion and counterflow chillers are more forgiving. If you brew hoppy IPAs frequently, either use a hop spider with a plate chiller or choose an immersion model.
Frequently asked questions about wort chillers cover type, material, sanitization, and cooling time
What is the best type of chiller for wort?
Immersion chillers are best for beginners due to easy setup and cleaning. Plate chillers offer the fastest cooling for intermediate brewers with pumps. Counterflow chillers provide professional efficiency for advanced brewers willing to invest in more equipment.
Is a wort chiller worth it?
A wort chiller is worth it for any brewer making all-grain or full-volume extract batches. It reduces cooling time from 30-40 minutes to under 15 minutes, which prevents off-flavors, reduces contamination risk, and improves beer clarity.
Which is better copper or stainless steel wort chiller?
Copper offers faster cooling due to higher thermal conductivity, but requires more maintenance and tarnishes over time. Stainless steel is more durable, easier to clean, and resists corrosion, making it better for brewers who prioritize low maintenance.
Do you need to sanitize a wort chiller?
Immersion chillers can be sanitized by placing them in the boiling wort for the last 10-15 minutes of the boil. Plate and counterflow chillers must be sanitized by recirculating boiling water or a no-rinse sanitizer through them before use.
How long does a wort chiller take to cool a batch?
Immersion chillers typically cool 5 gallons in 10-20 minutes. Plate chillers can do the same in 5-10 minutes. Counterflow chillers usually take 8-12 minutes depending on flow rate and cooling water temperature.
Final thoughts confirm the NY Brew Supply stainless steel immersion chiller as the top choice for most brewers
Choosing the best wort chiller for your setup depends on your batch size, budget, and how much maintenance you are willing to do. For most homebrewers, the NY Brew Supply stainless steel immersion chiller remains the top choice in 2026 because it balances speed, durability, and simplicity at a fair price.
If you want maximum cooling speed and have the equipment to support it, the Northern Brewer counterflow chiller or the BestEquip plate chiller will shave minutes off your brew day. Beginners and occasional brewers should start with the Coldbreak copper or the compact NY Brew Supply 20-foot model. Any of these ten chillers will get you out of the ice bath and into better beer.