Adding a second screen to your desk is one of the most impactful upgrades you can make. Research consistently shows that dual monitor setups can boost productivity by up to 30%, primarily by eliminating the friction of constant window-switching. Whether you are a developer managing code and documentation side-by-side, a writer researching while drafting, or a data analyst comparing spreadsheets, learning how to set up a dual monitor workstation will transform how you work.
In this complete guide, I will walk you through every step from checking your hardware compatibility to optimizing your workspace ergonomics. I have set up dozens of multi-monitor workstations over the past five years, and I have distilled the most reliable methods for both Windows and Mac systems. By the end of this guide, you will have a fully functional dual screen setup tailored to your specific needs.
Table of Contents
Why Dual Monitors Transform Your Workflow?
The productivity gains from a dual monitor workstation go beyond simply having more pixels. When you can keep your primary work on one screen and reference materials, communication tools, or monitoring apps on another, your brain stays in flow state longer. You eliminate the cognitive load of alt-tabbing and searching for buried windows.
Different professions benefit in unique ways. Developers can code on their main display while viewing documentation or testing results on the second. Writers keep their draft on one screen and research on another. Financial analysts view real-time data feeds alongside their trading platforms. Graphic designers put their canvas front and center with tools and palettes moved to the secondary display.
The key advantage is context preservation. When your eyes move between screens, your brain maintains spatial awareness of where everything lives. This is fundamentally different from digging through a stack of minimized windows where you must mentally reload each application’s state every time you switch.
Equipment Requirements Checklist
Before you start connecting cables, you need to verify your computer can support two displays. Most modern desktops and laptops built after 2026 support multiple monitors, but the specific connection types and maximum resolution depend on your graphics hardware.
Graphics Card and Video Output Ports
Check the back of your desktop computer or the sides of your laptop for video output ports. Common port types include HDMI, DisplayPort, USB-C (with DisplayPort Alt Mode), DVI, and VGA. You need at least two functional video outputs to run dual monitors directly.
If you have a dedicated graphics card (GPU), the ports on the motherboard typically get disabled. Use the ports on your graphics card instead. High-end GPUs often support three or more monitors simultaneously. For integrated graphics (Intel, AMD APU), most support at least two displays, though check your specific processor specifications.
Understanding Cable Types
Choosing the right cable ensures you get the best image quality and refresh rate. Not all cables are created equal, and using the wrong type can limit your monitor’s performance.
| Cable Type | Max Resolution | Audio Support | Best Use Case |
|---|---|---|---|
| HDMI 2.1 | 8K at 60Hz | Yes | General purpose, 4K monitors |
| DisplayPort 1.4 | 8K at 60Hz | Yes | Gaming, high refresh rates |
| USB-C/Thunderbolt | 4K at 60Hz | Yes | Laptops, daisy chaining |
| DVI | 2560×1600 at 60Hz | No | Older monitors only |
| VGA | 2048×1536 at 85Hz | No | Legacy equipment |
DisplayPort offers the most flexibility for PC users, supporting daisy chaining (connecting monitors in series) and higher bandwidth than HDMI at equivalent versions. HDMI is universally compatible and works well for most office setups. USB-C with DisplayPort Alt Mode is becoming standard on modern laptops and allows single-cable docking.
Laptop-Specific Solutions
Modern laptops often have limited ports, sometimes just one USB-C and one HDMI. For laptops with only one video output, you need a docking station or USB-C hub with video output capabilities. Thunderbolt docks can drive two 4K monitors through a single cable while also charging your laptop.
Some USB-C hubs support DisplayPort MST (Multi-Stream Transport), allowing you to run two monitors from a single port. Check your laptop specifications to confirm MST support before purchasing hardware.
How to Connect Your Monitors: Physical Setup
Once you have verified your ports and gathered the correct cables, it is time for the physical connection. Turn off your computer before plugging in cables to avoid any potential electrical issues, though modern systems are generally hot-swappable.
Step 1: Connect the first monitor to your computer using your primary video output. This will become your main display. Step 2: Connect the second monitor to your remaining video output port. Step 3: Connect power cables to both monitors and plug them into a surge protector. Step 4: Power on your monitors first, then start your computer.
If either monitor shows “no signal,” verify the cable is fully inserted and that you have selected the correct input source on the monitor itself. Most monitors have a physical button to cycle through HDMI, DisplayPort, and other input sources.
How to Configure Display Settings in Windows?
After the physical connections are complete, you need to tell Windows how to use your dual monitor setup. The default behavior may not match your physical desk arrangement, so proper configuration is essential.
Accessing Windows Display Settings
On Windows 11, right-click on your desktop and select “Display settings.” On Windows 10, the path is the same. Alternatively, press Windows key + I to open Settings, then navigate to System > Display. You can also use the shortcut Windows key + P to quickly toggle between display modes without opening settings.
You will see a visual representation of your connected displays, numbered 1 and 2. If one monitor is not showing, click the “Detect” button to force Windows to scan for connected displays.
Arranging Your Displays
The display icons in settings represent your physical monitors. Drag these icons to match their actual positions on your desk. If your second monitor is physically to the right of your primary monitor, drag icon 2 to the right of icon 1. This ensures your mouse cursor moves naturally between screens.
Click the “Identify” button to see which number appears on each physical monitor. This helps you match the correct display to the correct icon. If you accidentally position them wrong, your mouse will hit an invisible wall or jump unexpectedly when crossing screens.
Choosing Display Mode: Extend vs Duplicate
Scroll down to the “Multiple displays” section in Windows settings. You will see several options that control how your monitors behave:
- Extend these displays: This creates one large desktop across both monitors. This is the correct mode for productivity work.
- Duplicate these displays: This shows the same image on both monitors. Useful for presentations, not for daily work.
- Show only on 1 or 2: This disables one monitor entirely.
Select “Extend these displays” for a proper dual monitor workstation. Each monitor will operate at its native resolution, and you can move windows freely between them.
Setting Your Primary Display
Your primary display hosts the taskbar by default and is where new applications first open. Click on the display icon you want as primary, then scroll down and check “Make this my main display.” Your taskbar and system tray will move to this monitor.
On Windows 11, you can also choose to show the taskbar on all displays or only the primary. This setting is found under Settings > Personalization > Taskbar > Taskbar behaviors.
Mac Configuration: Setting Up Dual Displays
macOS handles multiple monitors differently than Windows, but the setup process is equally straightforward. Mac users benefit from excellent HiDPI scaling and Retina display support, though the arrangement options are slightly different.
Accessing macOS Display Settings
Click the Apple menu and select System Settings (or System Preferences on older macOS versions). Navigate to Displays in the sidebar. You will see your connected monitors represented as separate windows or tabs depending on your macOS version.
Unlike Windows, macOS opens display settings for each monitor in separate windows. Click “Arrangement” to see the positioning layout for all connected displays.
Arranging Monitors on Mac
In the Arrangement tab, you will see blue rectangles representing your displays. Drag these to match your physical layout just like in Windows. The white menu bar at the top of one rectangle indicates your primary display.
To change which monitor is primary, simply drag the white menu bar to a different display rectangle. The menu bar and Dock will immediately move to the selected monitor. Uncheck “Mirror Displays” to enable extended desktop mode instead of duplicate mode.
MacBook-Specific Considerations
MacBook users have additional options for their setup. You can use your MacBook screen as one display and an external monitor as the second. Alternatively, close your MacBook (clamshell mode) and use only external monitors. For clamshell mode, you need external keyboard, mouse, and power connected.
Recent MacBook Pro models with M1 Pro, M1 Max, M2 Pro, M2 Max, or later chips can drive up to four external displays simultaneously. Base M1 and M2 MacBooks support only one external monitor, though DisplayLink adapters can bypass this limitation for office work (not gaming).
If your external monitor looks blurry on a Mac, check the scaling options in Display settings. Select “Default for display” for native resolution, or choose “Scaled” and pick the HiDPI options that show text at larger sizes.
Ergonomic Workspace Design
Proper monitor positioning prevents neck strain, eye fatigue, and long-term postural issues. The benefits of dual monitors diminish if you are constantly twisting your neck or straining to see the screen.
Optimal Monitor Placement
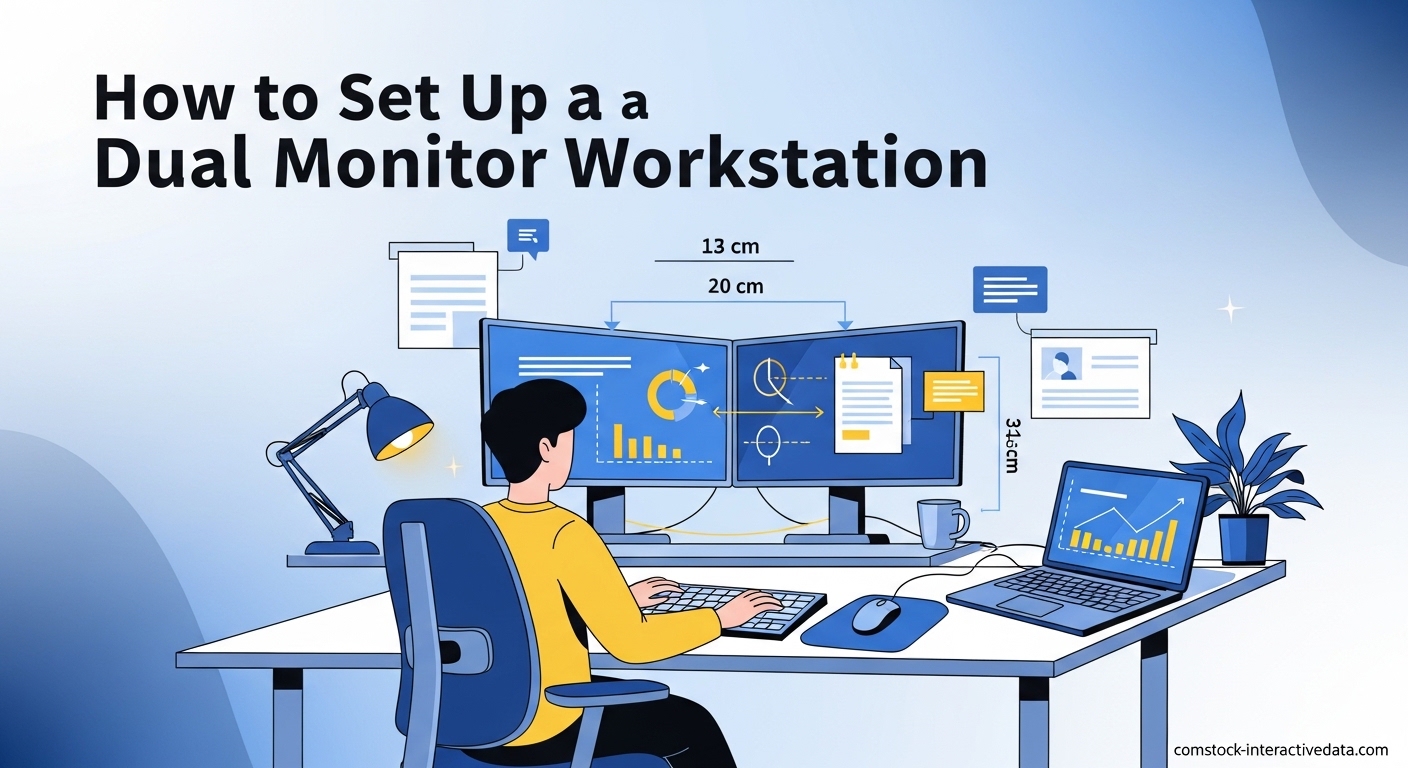
Position your primary monitor directly in front of you at arm’s length distance (20-26 inches). The top of the screen should be at or slightly below eye level. This keeps your neck in a neutral position. If you wear bifocals, you may need to lower the monitor slightly to avoid tilting your head back.
Your secondary monitor should be positioned at a slight angle (30 degrees or less) from your primary monitor. If you use the second monitor less frequently, place it to the side. If both monitors get equal use, center yourself between them and turn your chair rather than your neck when switching focus.
Physical Layout Options
The standard side-by-side arrangement works for most users. Both monitors sit horizontally next to each other, aligned at the same height. This is ideal for comparing documents or extending your workspace across a wide area.
Stacked arrangements place one monitor above the other. This works well in small desk spaces or when using a large primary monitor with a smaller secondary screen. Just ensure the upper monitor does not require you to crane your neck upward.
Portrait mode (vertical orientation) benefits programmers, writers, and anyone working with long documents. Most monitors support 90-degree rotation. In portrait mode, you can see more lines of code or text without scrolling. Use your secondary monitor in portrait while keeping your primary in landscape for the best of both worlds.
Cable Management Essentials
Two monitors mean twice as many cables. Route power and video cables behind your desk using cable clips, velcro ties, or a cable management tray. Monitor arms with integrated cable routing create a cleaner aesthetic than stock monitor stands.
Consider a power strip mounted under your desk to keep power bricks and excess cord length hidden. Label your cables at both ends so you can quickly identify which cable belongs to which monitor when troubleshooting.
Troubleshooting Common Dual Monitor Issues
Even with proper setup, you may encounter issues. These are the most common problems and their solutions based on forum discussions and my own experience troubleshooting setups.
Monitor Not Detected
If Windows or Mac does not see your second monitor, start with the basics. Verify the monitor is powered on and set to the correct input source. Try a different cable to rule out a bad connection. Check that your graphics drivers are up to date by visiting NVIDIA, AMD, or Intel’s website directly rather than relying on Windows Update.
In Windows display settings, click the “Detect” button under the “Multiple displays” section. On Mac, hold Option and click the Detect Displays button in Display settings (this button only appears when holding Option on some macOS versions).
If using a docking station, ensure the dock firmware is updated. Some docks require external power to drive multiple monitors. Daisy-chained DisplayPort monitors must support MST (Multi-Stream Transport) or only the first monitor will work.
Resolution and Scaling Problems
Mixed resolution setups (like a 1080p monitor paired with a 4K monitor) can cause scaling issues. Windows may apply the same scaling percentage to both monitors, making text too small on one or too large on the other.
In Windows display settings, click each monitor individually and adjust the “Scale” percentage independently. Windows 11 handles per-monitor scaling better than Windows 10. On Mac, each display can have its own scaling setting automatically.
When dragging windows between monitors of different resolutions, the window may resize abruptly. This is normal behavior as the operating system adjusts to the new pixel density. Applications need to restart to fully adapt to DPI changes.
Mouse Jumping and Alignment Issues
If your mouse jumps unexpectedly when moving between monitors, or gets “stuck” at invisible boundaries, your display arrangement in settings does not match physical reality. Open display settings and ensure the monitor edges align properly in the virtual layout.
Different sized monitors or mismatched resolutions can create alignment issues where the bottom of one monitor does not line up with the bottom of the other. You can offset the vertical positioning in Windows display settings by dragging one monitor icon higher or lower than the other to match the physical bezel positions.
Window Management Mastery
Once your monitors are configured, learning to move windows efficiently between them separates power users from beginners. Keyboard shortcuts eliminate the drag-and-drop dance.
Essential Keyboard Shortcuts
Windows provides built-in shortcuts for window management. Press Windows key + Left or Right arrow to snap a window to half the current screen. Continue pressing the arrow key to jump the window to the adjacent monitor. Windows key + Up maximizes; Windows key + Down minimizes.
Windows key + Shift + Left or Right arrow moves the active window to the next monitor in that direction without changing the window size. This is the fastest way to relocate applications between screens.
Mac users press Control + F3 to focus the Dock, then use arrow keys to navigate. For moving windows between displays on Mac, you typically drag them or use third-party software as macOS has fewer built-in keyboard options than Windows.
Window Management Software
Third-party tools unlock advanced window management capabilities. For Windows, Microsoft PowerToys includes FancyZones, which lets you create custom window layouts and snap windows with keyboard shortcuts. This is invaluable for maintaining consistent workspace arrangements.
Mac users should consider Magnet (paid, App Store) or Rectangle (free, open source). These apps add Windows-like snapping behavior and keyboard shortcuts to macOS. They allow you to position windows in corners, thirds, or custom zones across multiple monitors.
Both FancyZones and Magnet remember window positions when you disconnect and reconnect monitors. This saves significant time when docking and undocking laptops.
Advanced Tips and Personalization
After mastering the basics, these advanced configurations help you squeeze maximum value from your dual monitor workstation.
Different Wallpapers Per Monitor
Windows 11 supports different wallpapers on each monitor natively. Right-click any image and select “Set for monitor 1” or “Set for monitor 2.” In Windows 10, you can select different images in Settings > Personalization > Background by right-clicking thumbnails and choosing which monitor.
On Mac, open System Settings > Wallpaper, then right-click on any wallpaper and select which display to apply it to. This personalization helps visually distinguish which monitor is which at a glance.
Portrait Mode for Coding and Writing
To rotate a monitor to portrait orientation, first physically rotate the display 90 degrees (usually requires a monitor arm or stand with rotation capability). Then in Windows display settings, select the rotated monitor and change “Display orientation” from Landscape to Portrait. Mac users select the display and choose 90 degrees in the Rotation dropdown.
Portrait mode excels for reading long documents, viewing social media feeds, writing code in terminal or IDE, and chat applications. Most websites and applications work fine in portrait, though some legacy software may not handle the orientation well.
Taskbar and System Tray Customization
Windows 11 allows extensive taskbar customization for dual monitors. In Settings > Personalization > Taskbar > Taskbar behaviors, choose whether to show the taskbar on all displays or only the main display. You can also choose where taskbar buttons appear and whether to show all open windows on all taskbars or only on the taskbar where the window is located.
Mac users cannot split the menu bar across displays, but third-party tools like Bartender help manage menu bar clutter on your primary display when running many applications.
FAQs
How to connect two monitors to one computer full guide?
To connect two monitors: 1) Check your computer has two video outputs (HDMI, DisplayPort, USB-C). 2) Gather compatible cables for your ports. 3) Turn off your computer and connect both monitors. 4) Power on monitors first, then your computer. 5) Open display settings (Windows: Settings > System > Display; Mac: System Settings > Displays). 6) Arrange displays to match physical layout. 7) Select ‘Extend these displays’ mode. 8) Set your primary display.
What is the best layout for dual monitor setup?
The best layout depends on usage. For equal use of both monitors, place them side-by-side with the primary monitor centered in front of you and the secondary angled 30 degrees to the side. Keep both at eye level. For occasional secondary monitor use, center your primary monitor and place the secondary to one side. Portrait orientation works well for coding and document reading.
What is needed for a dual monitor setup?
You need: a computer with two video outputs (or a docking station for laptops), compatible video cables (HDMI, DisplayPort, or USB-C), two monitors, adequate desk space, and optionally a monitor arm for ergonomic positioning. Check your graphics card supports dual displays and that ports match your monitor inputs.
How to set up a dual monitor desk?
1) Clear adequate desk space – minimum 48 inches wide recommended. 2) Position primary monitor at arm’s length, top at eye level. 3) Place secondary monitor angled 30 degrees to the side. 4) Use monitor arms for flexibility and cable management. 5) Route cables behind the desk. 6) Ensure proper lighting to reduce glare. 7) Leave space for keyboard and mouse centered on primary monitor.
Can I use two different size monitors together?
Yes, different sized monitors work together. Windows and Mac handle mixed resolutions automatically. You may need to adjust scaling settings independently for each monitor so text appears consistent. When dragging windows between monitors of different sizes or resolutions, expect some resizing behavior as the window adapts to the new display’s pixel density.
Why is my second monitor not detected?
Common causes: monitor not powered on, wrong input source selected, loose cable connection, outdated graphics drivers, or unsupported daisy chain configuration. Solutions: verify power and input source, reseat cables, update GPU drivers from manufacturer website, click ‘Detect’ in Windows display settings, try different cables, restart computer with monitors connected.
How do I make one monitor the main display?
Windows: Open Settings > System > Display, click the monitor you want as primary, scroll down and check ‘Make this my main display.’ The taskbar and system tray will move to this monitor. Mac: Open System Settings > Displays > Arrangement, drag the white menu bar to the display you want as primary. The menu bar and Dock will relocate.
How to extend desktop to second monitor?
Windows: Right-click desktop > Display settings > Scroll to ‘Multiple displays’ > Select ‘Extend these displays’ from dropdown. Windows key + P shortcut also cycles through modes. Mac: System Settings > Displays > Arrangement > Uncheck ‘Mirror Displays’ to enable extended desktop. Each monitor will show independent content and you can drag windows between them.
Conclusion
Setting up a dual monitor workstation is one of the most cost-effective productivity upgrades you can make. The process involves three main phases: verifying your hardware compatibility and gathering cables, physically connecting the monitors, and configuring your operating system to extend the desktop across both displays.
Whether you use Windows or Mac, the configuration options allow you to match your virtual display layout to your physical desk arrangement. Pay attention to ergonomic positioning to prevent neck strain and eye fatigue. With your dual monitor workstation fully configured in 2026, you will experience smoother multitasking, fewer interruptions from window management, and a more organized digital workspace.
Start by checking your computer’s available video outputs, choose the appropriate cables from the comparison table above, and follow the step-by-step configuration guides for your operating system. Within minutes, you will join the millions of professionals who have discovered why two screens are genuinely better than one.